Cloud prerequisites
Prerequisites
Before configuring the Azure Cloud environment, ensure that you obtain the following from your Azure Cloud tenant:
- Active subscription and subscription ID for cost management.
- Tenant ID
- Sufficient permissions for the following:
- To register an application with your Azure AD tenant.
- To assign the application roles in your Azure subscription.
Create resource group (optional)
You may choose not to create a new resource group and instead use an existing one to manage YugabyteDB Anywhere resources.
Create network security group (optional)
You may choose not to create a new security group and instead use an existing one to manage network access.
To access the YugabyteDB Anywhere from outside the Azure environment, you would need to enable access by assigning an appropriate network security group to the YugabyteDB Anywhere machine. At a minimum, you need to be able to do the following:
- Access the YugabyteDB Anywhere instance over SSH (port
tcp:22). - Check, manage, and upgrade YugabyteDB Anywhere (port
tcp:8800) (Replicated installations only). - View the YugabyteDB Anywhere UI (port
tcp:80ortcp:443).
If you are using your own custom Virtual Private Cloud (VPC), as it is typically the case for a self-managed configuration, the following additional TCP ports must be accessible: 7000, 7100, 9000, 9100, 18018, 11000, 12000, 9300, 9042, 5433, and 6379. For more information on ports used by YugabyteDB, refer to Default ports.
YugabyteDB Anywhere will provision and access database nodes in a later step; you need to provide a virtual network where YugabyteDB Anywhere will create the database nodes. Therefore, you have to ensure connectivity between the YugabyteDB Anywhere VM virtual network and database VM's virtual network. You may also require virtual network peering based on your network configuration. Ensure that YugabyteDB Anywhere can access these nodes on the database VM's virtual network.
To create a security group that enables these artifacts, navigate to Network Security Groups > Add, then choose subscription, select the resource group used in the previous step, then add name and region, click Create Security Group, and then add the following values:
- In the Name field, enter yugaware-sg or any other name.
- Edit inbound security rules, as follows:
- Add the appropriate IP addresses to the Source IP ranges field. To allow access from any machine, enter 0.0.0.0/0, but note that this is not very secure.
- Add the ports 22, 8800, 80, and 443 to the Port Range field. The protocol selected must be TCP. For a self-managed configuration, also add 7000, 7100, 9000, 9100, 18018, 11000, 12000, 9300, 9042, 5433, and 6379 to the Port Range field.
Create a service principal
For YugabyteDB Anywhere to manage YugabyteDB nodes, it requires limited access to your Azure infrastructure. This can be accomplished by registering an application in the Azure portal so the Microsoft identity platform can provide authentication and authorization services for your application. Registering your application establishes a trust relationship between your application and the Microsoft identity platform.
Complete the following steps to create the application registration:
-
Sign in to the Azure portal.
-
If you have access to multiple tenants, use the directory and subscription filter in the top menu to select the tenant used in previous steps to register an application.
-
Search for and select the Azure Active Directory.
-
Under Manage, select App registrations, then New registration.
-
Enter a name for your application. Users of your application might see this name, and you can change it later.
-
Specify who can use the application. You can use either single or multiple tenant options.
-
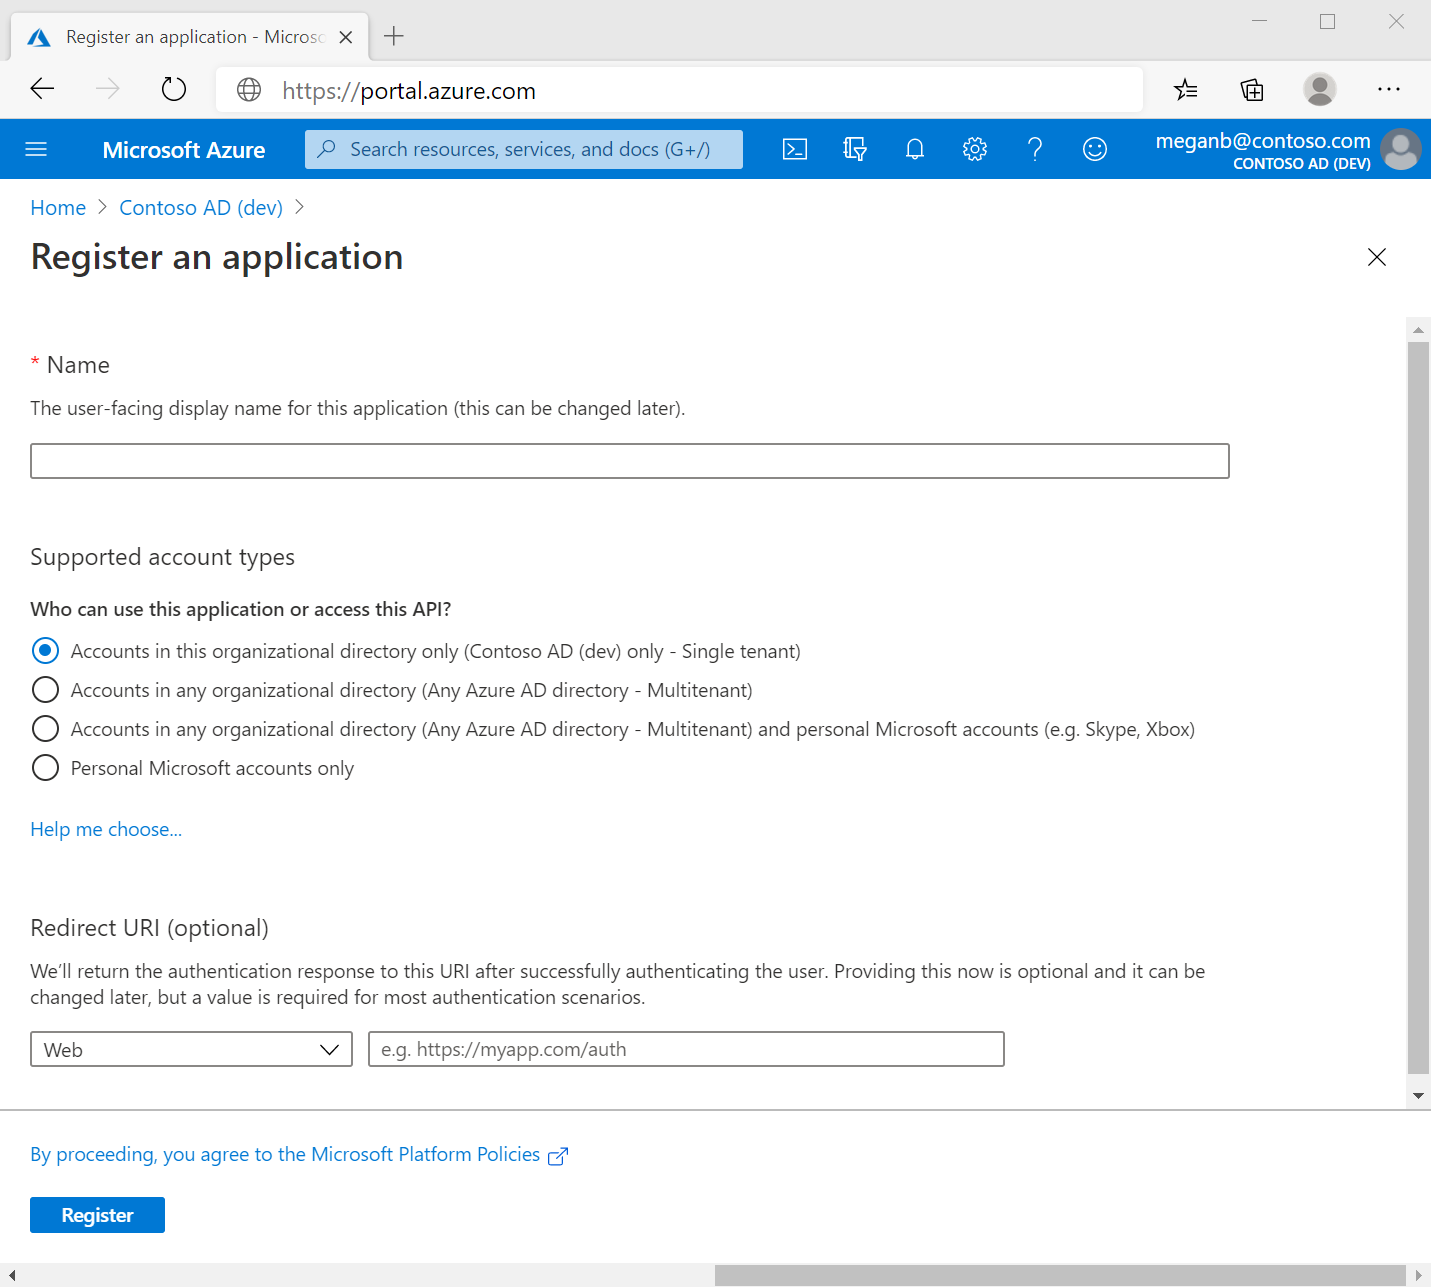
Do not enter anything for Redirect URI and click Register to complete the initial application registration, as per the following illustration:

-
When registration completes, the Azure portal displays the application registration's Overview, which includes its Application (client) ID. Also referred to as just client ID, this value uniquely identifies your Microsoft identity platform application.
-
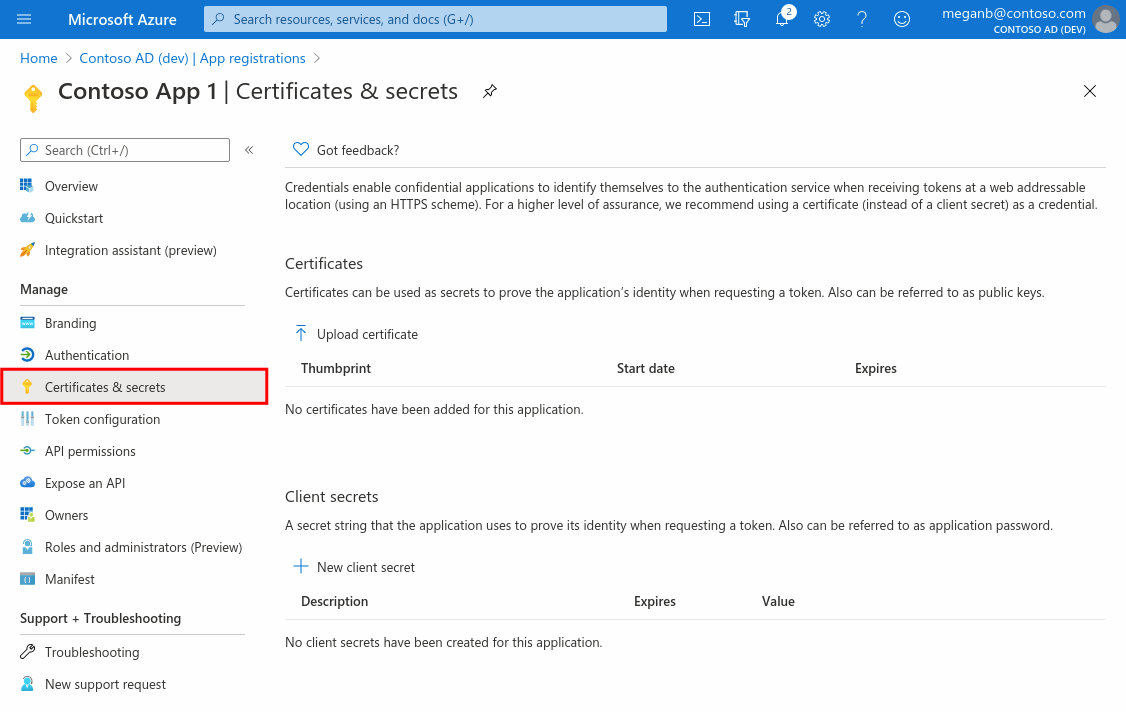
For the application authentication, select Certificates & secrets > New client secret.
-
Add a description of your client secret.
-
Select a duration.
-
Click Add.
-
Record the secret's value to be used later for configuring YugabyteDB Anywhere, as it is never displayed again after you leave the page.

Assign a role to the application
Access to Azure infrastructure resources in a subscription (virtual machines, network configurations) is restricted by the roles assigned to your application, giving you control over which resources can be accessed and at what level. You can set the scope at the level of the subscription, resource group, or resource. Permissions are inherited to lower levels of scope. Permissions should be assigned over a resource group that you already created. For additional information, see the Azure documentation Assign a role to the application.
Proceed by performing the following:
-
In the Azure portal, navigate to the resource group and select Access control (IAM).
-
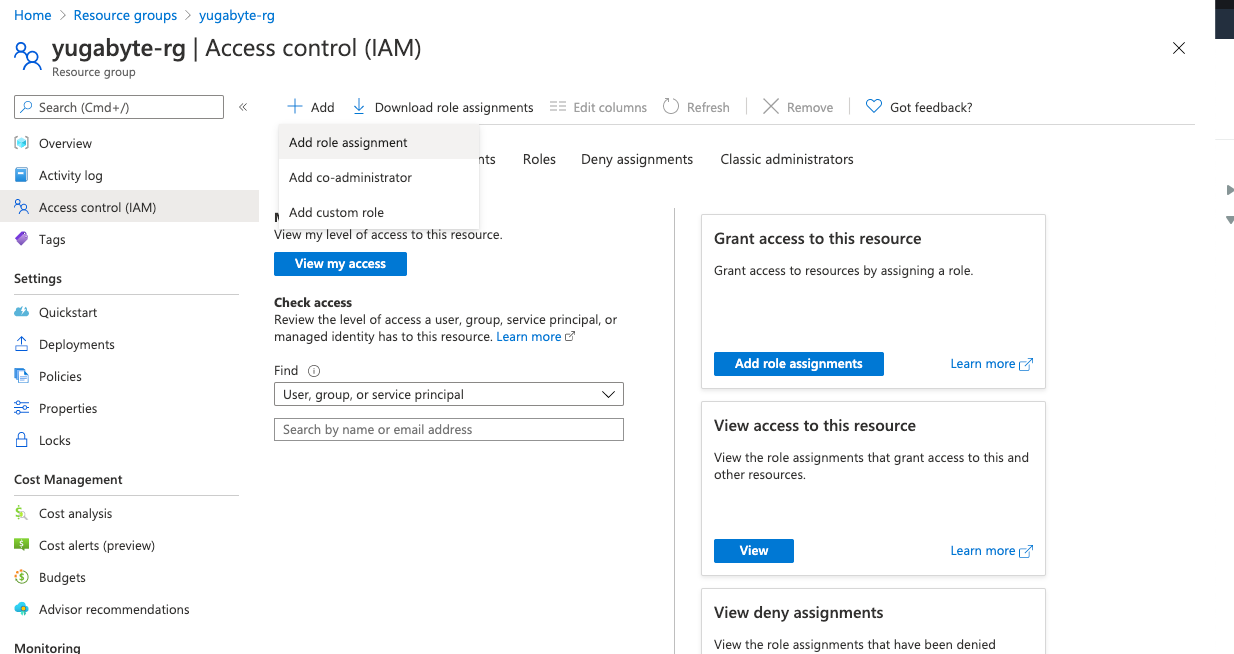
Select Add > Add role assignment, as per the following illustration:

-
Select Network Contributor and Virtual Machine Contributor roles.
-
Select the application you created.
-
Click Save.
You should be able to see your application in the list of users with a role for that scope.
After your service principal is set up, you can start using it for configuring YugabyteDB Anywhere.
Provision instance for YugabyteDB Anywhere
To create an instance to run the YugabyteDB Anywhere server, navigate to Virtual Machines > Add and provide the following:
- Select your active subscription and resource group.
- Provide a name for the virtual machine.
- Choose a region where you want to deploy YugabyteDB Anywhere.
- Ignore the availability options.
- Change the disk image to Ubuntu 16.04.
- Choose Standard_D4s_v3 - 4 CPU/16GB memory instance.
- Select the authentication type as the SSH public key. Select an existing key pair or create a new one to access the machine. Ensure that you have the SSH access key, as this is important for enabling SSH access to this machine.
- Select public inbound ports based on the network configuration. You can disable public access if you wish to access the instance from in a private network.
- On the disks page, select any OS disk type.
- Increase the OS disk size to at least 100GB. For information on how to do this, see Increase the size of the OS disk.
- Continue to the next networking section and fill out the details for the virtual network and security group you created in Create network security group.
- Click Review and Create to launch the YugabyteDB Anywhere VM.