Create a multi-cloud universe
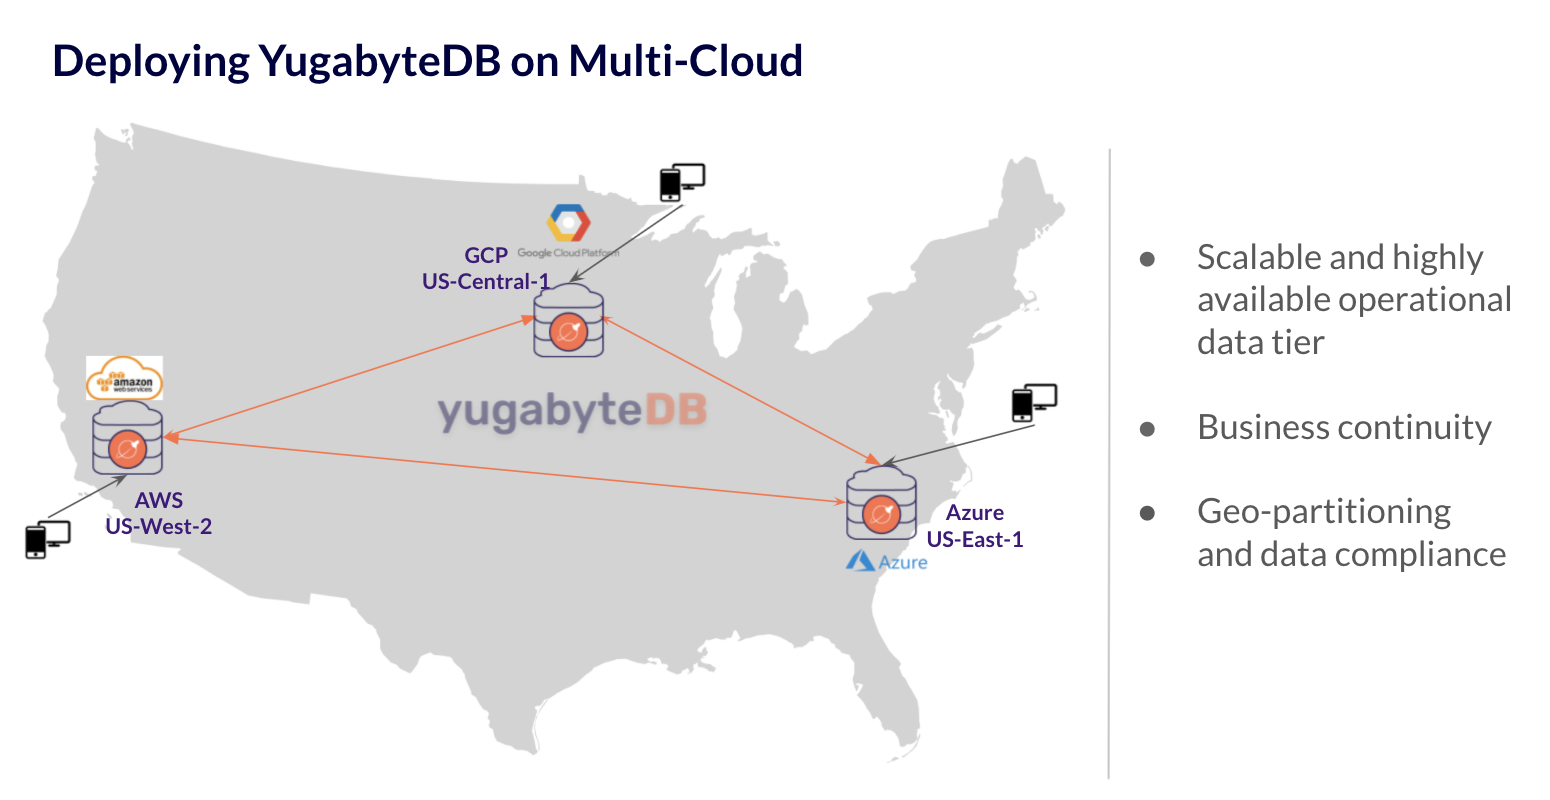
You can use YugabyteDB Anywhere to create a YugabyteDB universe spanning multiple geographic regions and cloud providers. For example, you can deploy a single universe across AWS (US-West-2), Google Cloud Provider (Central-1), and Microsoft Azure (US-East1).
The following depicts the universe topology:

To create a multi-cloud universe, you would need to do the following:
- Check prerequisites
- Set up node instance virtual machines in each cloud (AWS, GCP, and Azure)
- Set up VPC peering through a VPN tunnel across these 3 clouds
- Install YugabyteDB Anywhere on one of the nodes
- Configure the on-premises cloud provider
- Create a universe using the provider
- Run the TPC-C benchmark
Prerequisites
The following requirements must be met:
- You must be able to create a Virtual Private Cloud (VPC), subnets, and provision virtual machines (VMs) in every cloud provider that you want to use.
- You need root access on the instances to be able to create the Yugabyte user.
- The instances should have access to the Internet to download software (recommended).
Set up instance VMs
When you create a universe, you need to import nodes that can be managed by YugabyteDB Anywhere. To set up your nodes, follow instructions in Prepare nodes (on-premises).
Note the following:
- Your nodes across different cloud providers should be of similar configuration: vCPUs, DRAM, storage, and networking.
- For more information on ports used by YugabyteDB, refer to Default ports.
- Ensure that your YugabyteDB nodes conform to the requirements outlined in the deployment checklist, which gives an idea of recommended instance types across public clouds.
Set up VPC peering
You need to set up multi-cloud VPC peering through a VPN tunnel.
YugabyteDB is a distributed SQL database and requires TCP/IP communication across nodes. It also requires a particular set of firewall ports to be opened for cluster operations, which you set up in the previous section.
You should use non-overlapping Classless Inter-Domain Routing (CIDR) blocks for each subnet across different clouds.
All public cloud providers enable VPN tunneling across VPCs and their subnet to enable network discovery. As an example, see VPN between two clouds.
Install YugabyteDB Anywhere
Follow steps provided in Install YugabyteDB Anywhere to deploy YugabyteDB Anywhere on a new VM on one of your cloud providers. You will use this node to manage your YugabyteDB universe.
Configure the on-premises cloud provider
To deploy a multi-cloud universe, you first need to create an on-premises provider configuration. Refer to Create provider configuration for more information.
Set up the cloud provider
Navigate to Configs > On-Premises Datacenters and click Create Config. Complete the following fields:
-
Provider Name, for example,
multi-cloud-demo. -
SSH User is the user which will run YugabyteDB Anywhere on the node (yugabyte in this case).
-
SSH Port should remain the default of
22unless your servers have a different SSH port. -
Manually Provision Nodes should be disabled so that YugabyteDB Anywhere installs the software on these nodes.
-
SSH Key Pairs is the contents of the private key file to be used for authentication.
Note that Paramiko is used for SSH validation, which typically does not accept keys generated with OpenSSL. If you generate your keys with OpenSSL, use a format similar to the following:
ssh-keygen -m PEM -t rsa -b 2048 -f test_id_rsa -
DB Nodes have public internet access? should be enabled if your nodes have Internet connectivity (that is, you are not performing an airgap install).
-
Click Add Region to define the provider regions and availability zones. Enter descriptive names; for example, you could add the regions
aws-west-2inUS West,azu-east-1inUS East, andgcp-central-1inUS North. Add at least one availability zone for each region.
Click Create Provider Configuration when done.
Define instance types and add instances
After the provider configuration is created, select the provider in the On-Premises Datacenters list, and choose Instances to display the provider instances. This is where you create instance types and provision the nodes that your universe will be deployed on.
Click Add Instance Type and enter a machine description that matches the nodes you will be using. The machine type can be any logical name, given the machine types will be different between all three regions (cloud providers).
Click Add Instances to add nodes in the regions you defined for the provider configuration. For each node, select the zone where you want it deployed, choose the instance type, and enter the IP address of the node. The address should be a private IP address of the VPN you configured.
For more information, refer to Configure hardware for YugabyteDB nodes.
Create a universe
You can create a multi-region universe as follows:
-
Navigate to Dashboard or Universes and click Create Universe.
-
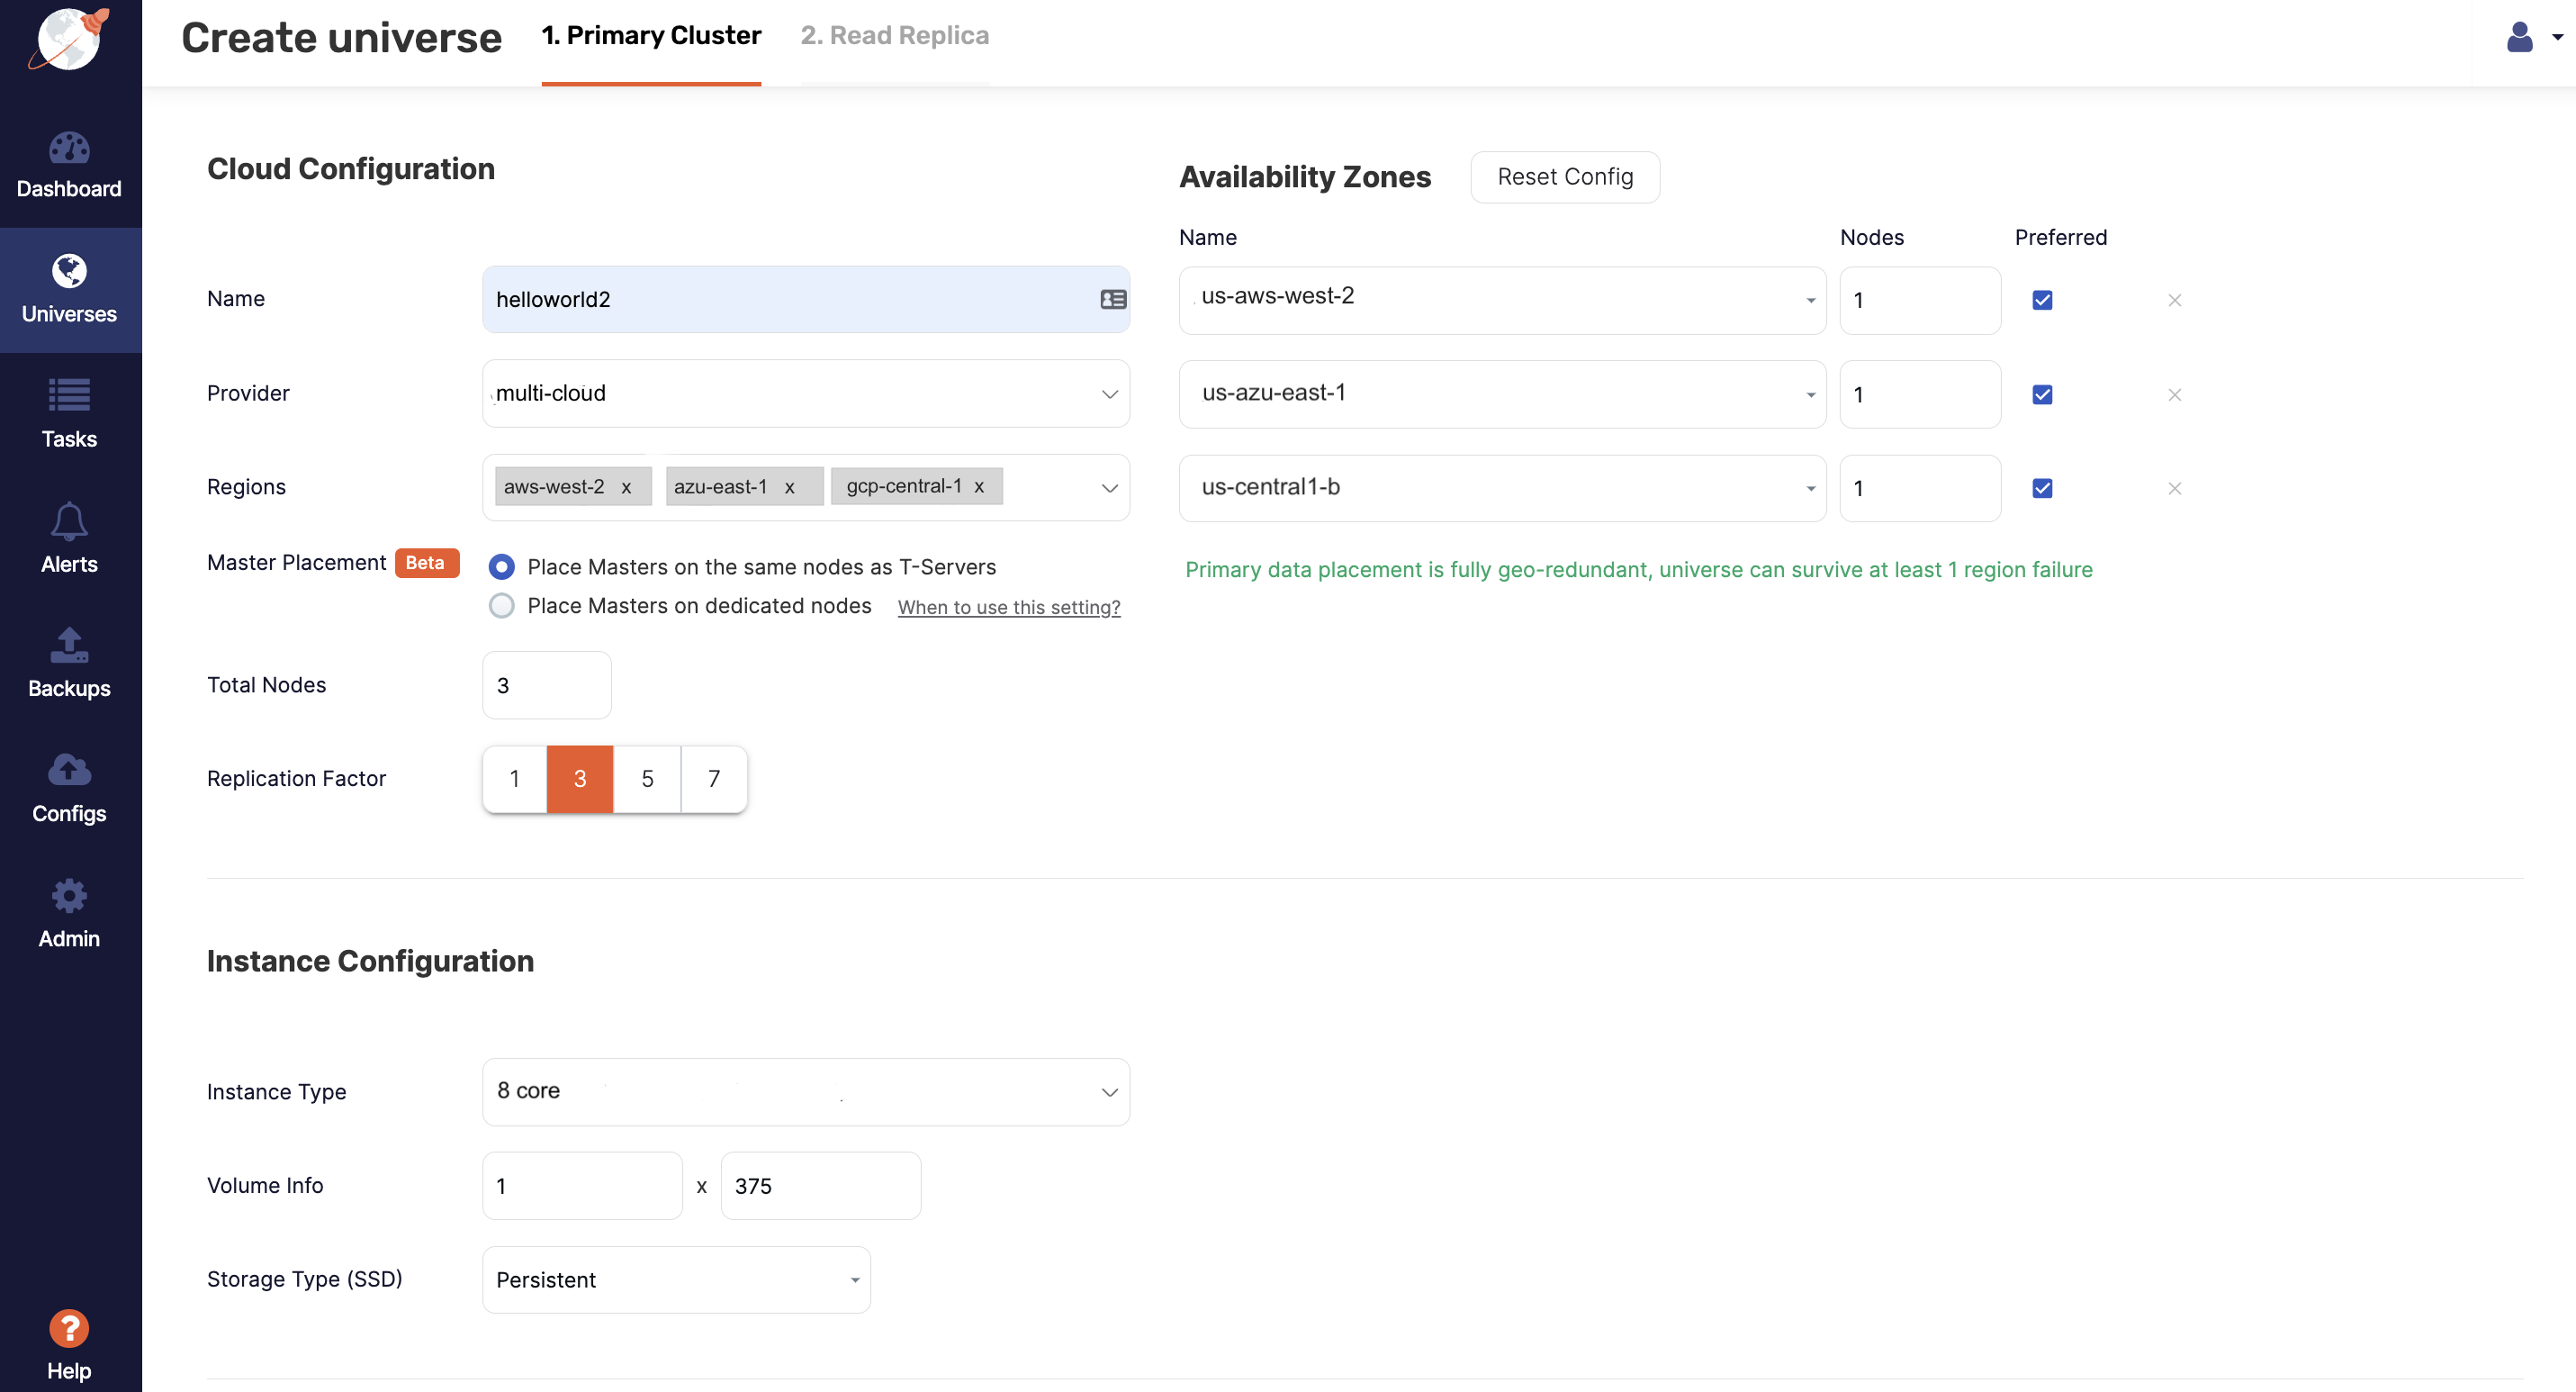
Complete the Primary Cluster fields, as shown in the following illustration:

-
Enter a name for the universe.
-
Choose the provider you created.
-
Select the regions, for example,
aws-west-2,azu-east-1, andgcp-central-1, and the corresponding availability zones. -
Set the instance type to the instance type you created.
-
Add the following flag to Master and T-Server:
leader_failure_max_missed_heartbeat_periods=10- As the data is globally replicated, RPC latencies are higher. This flag increases the failure-detection interval to compensate.
-
Click Create.
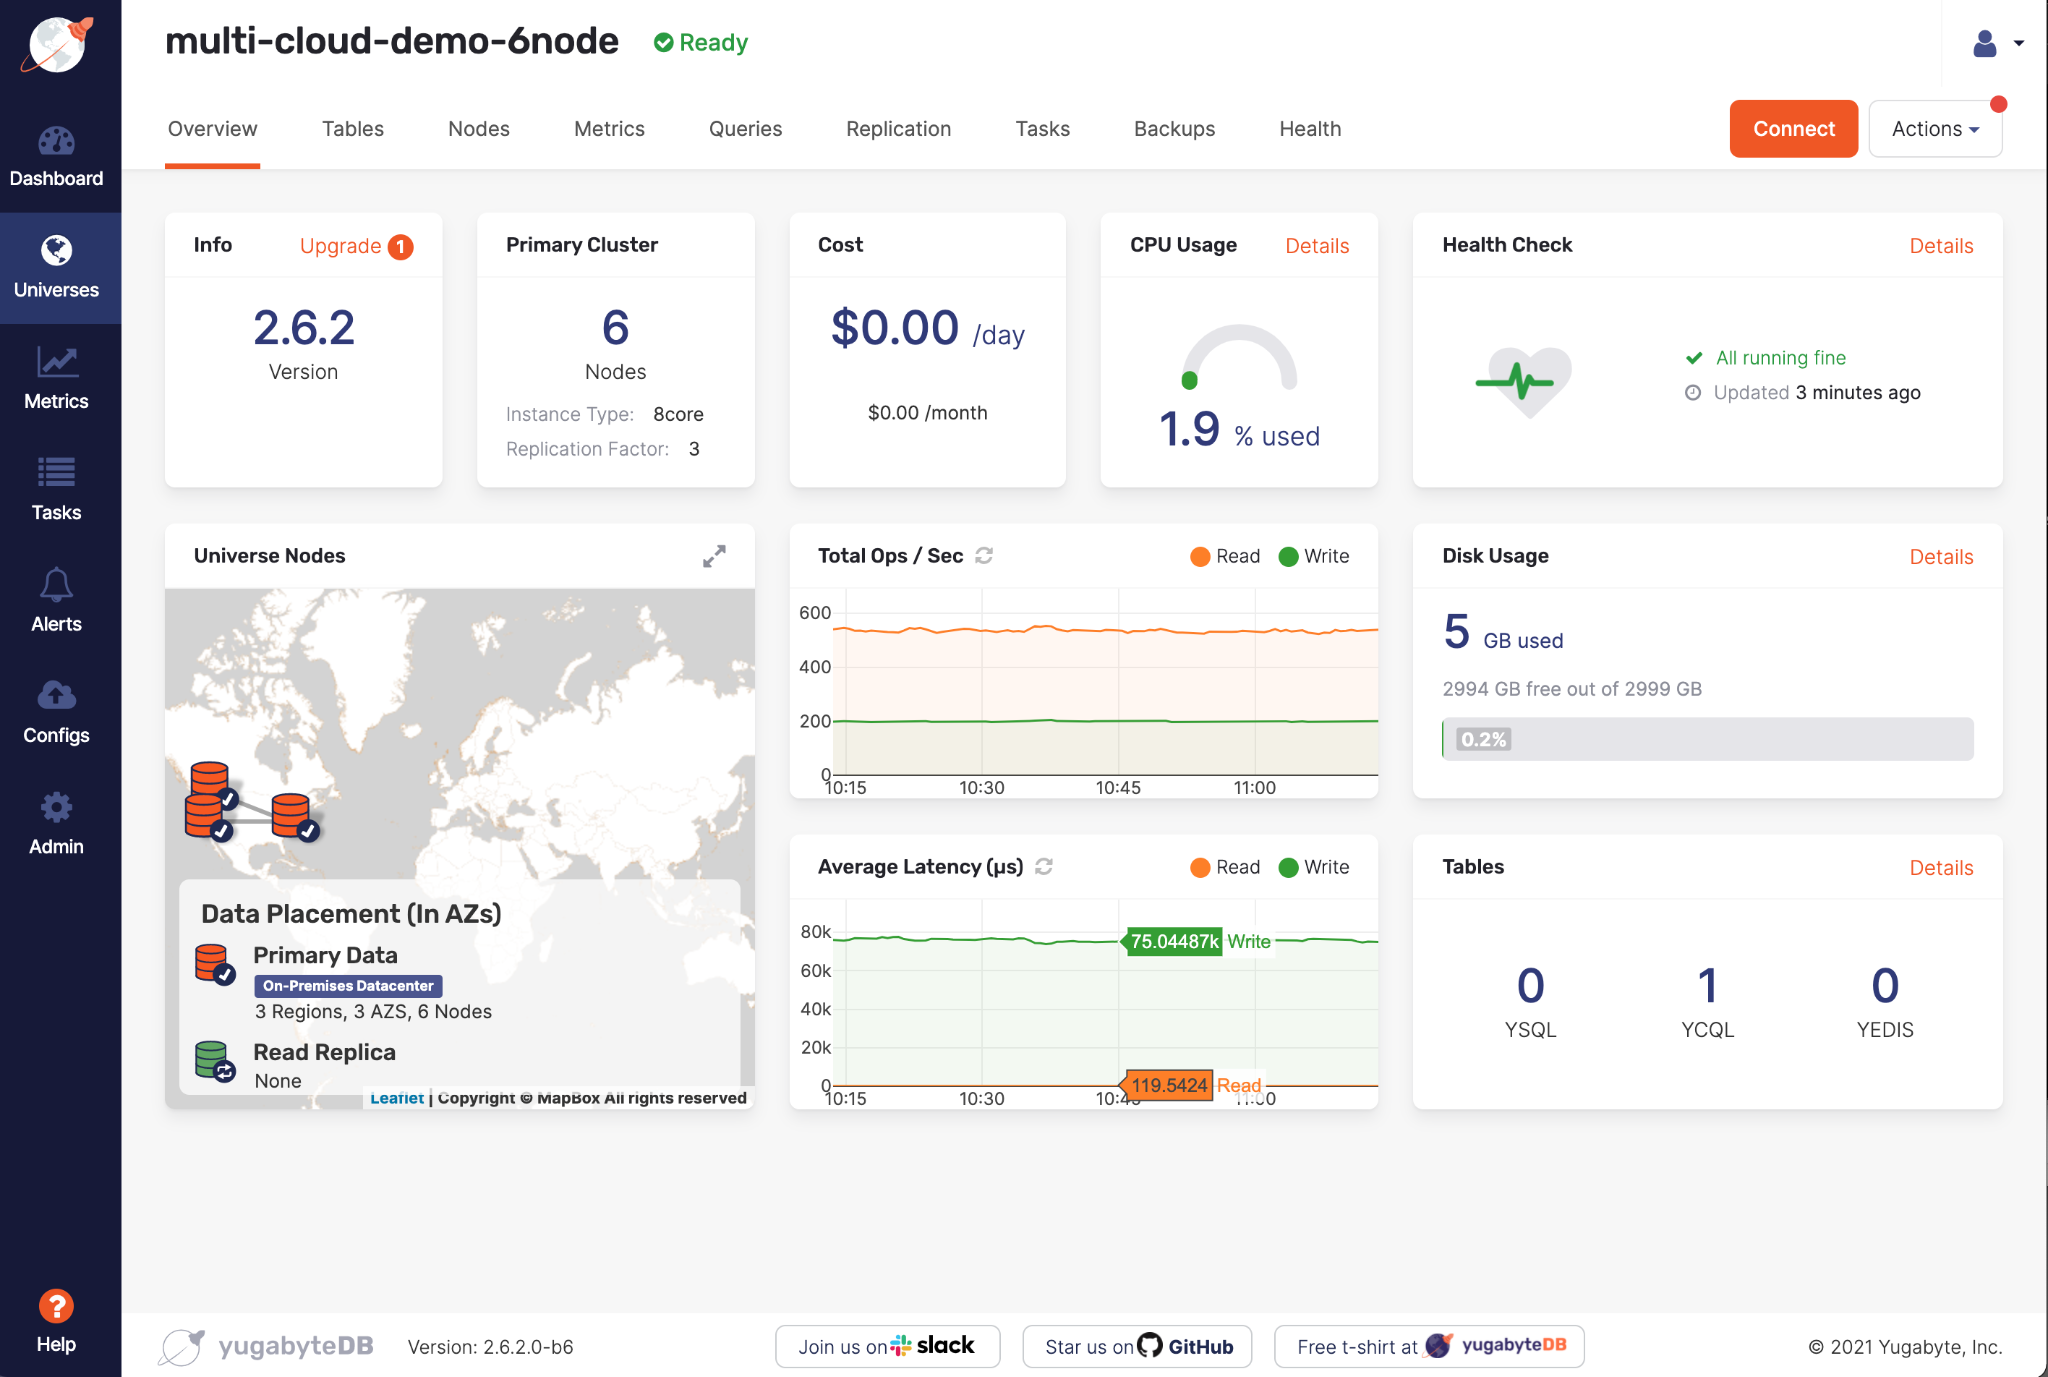
At this point, YugabyteDB Anywhere begins to provision your new universe across multiple cloud providers. When the universe is provisioned, it appears on the Dashboard and Universes. You can click the universe name to open its Overview.

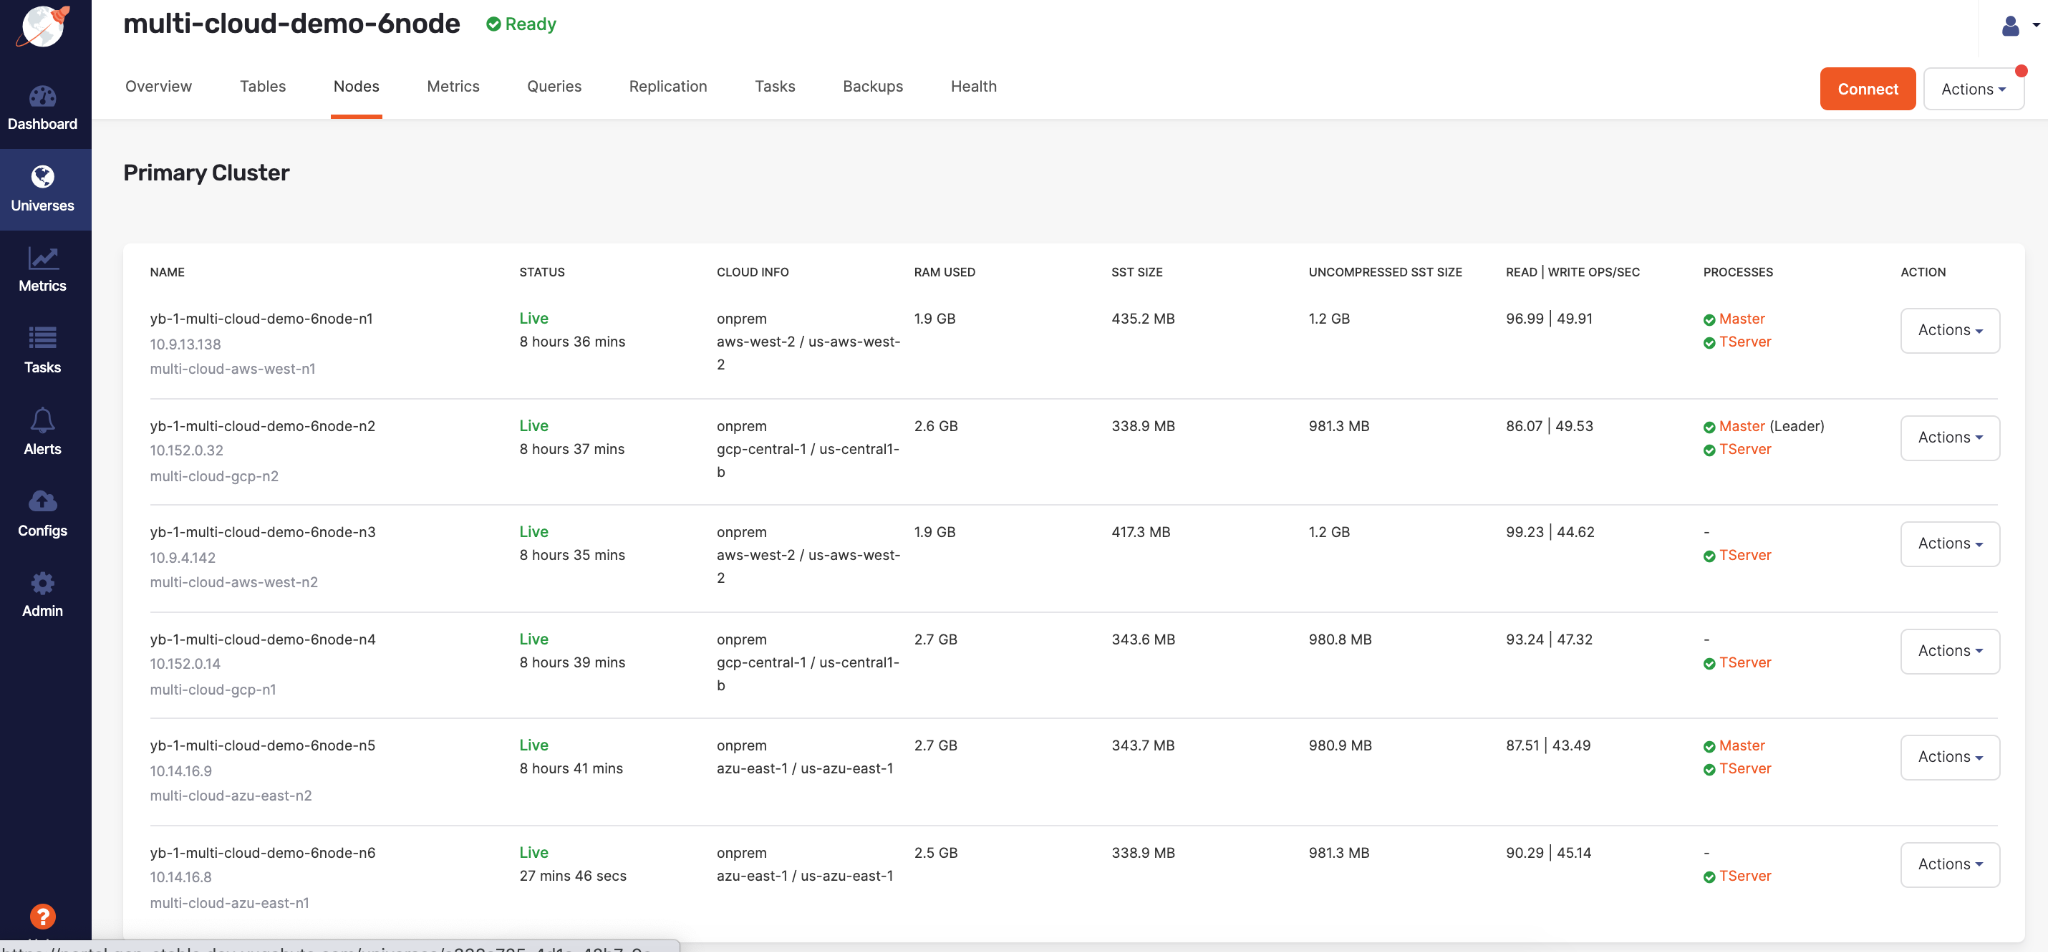
The new universe's nodes list will be similar to the following:

Run the TPC-C benchmark
To run the TPC-C benchmark on your universe, use commands similar to the following (with your own IP addresses):
./tpccbenchmark -c config/workload_all.xml \
    --create=true \
    --nodes=10.9.4.142,10.14.16.8,10.9.13.138,10.14.16.9,10.152.0.14,10.152.0.32 \
    --warehouses 50 \
    --loaderthreads 10
./tpccbenchmark -c config/workload_all.xml \
    --load=true \
    --nodes=10.9.4.142,10.14.16.8,10.9.13.138,10.14.16.9,10.152.0.14,10.152.0.32 \
    --warehouses 50 \
    --loaderthreads 10
./tpccbenchmark -c config/workload_all.xml \
    --load=true \
    --nodes=10.9.4.142,10.14.16.8,10.9.13.138,10.14.16.9,10.152.0.14,10.152.0.32 \
    --warehouses 50
Refer to Running TPC-C on Yugabyte for details.