Manage YugabyteDB Anywhere users
YugabyteDB Anywhere uses a role-based access control (RBAC) model to manage access to your YugabyteDB Anywhere instance (whether via the UI or the REST API). Using roles, you can enforce the principle of least privilege (PoLP) by ensuring that users have the precise permissions needed to fulfill their roles while mitigating the risk of unauthorized access or accidental breaches. A role defines a set of permissions that determine what features can be accessed by account users who have been assigned that role.
Starting with v2.20.1, RBAC is available with fine-grained control over access to universes. EA
Fine-grained RBAC is Early Access
Fine-grained RBAC with the ability to limit users to manage only a subset of universes is Early Access.
During EA, by default fine-grained RBAC is not enabled. To enable the feature, use following API command:
curl --request PUT \
  --url http://{yba_host:port}/api/v1/customers/{customerUUID}/runtime_config/00000000-0000-0000-0000-000000000000/key/yb.rbac.use_new_authz \
  --header 'Content-Type: text/plain' \
  --header 'X-AUTH-YW-API-TOKEN: {api_token}' \
  --data 'true'
Note that if you enable fine-grained RBAC, you can't turn it off. You should test the feature thoroughly in a development or staging environment before enabling it in your production environment.
Users and roles
A user can interact with a YugabyteDB Anywhere through the UI or REST API.
Users are assigned roles, which define the set of actions users can perform. If fine-grained RBAC is enabled, you can also define the set of universes to which the user has access.
YugabyteDB Anywhere includes built-in roles. If you have enabled fine-grained RBAC, you can also define custom roles for team members to restrict access to specific account features.
API tokens generated for users are assigned the same role as the user that generated them.
Built-in roles
The following built-in roles are available:
-
Super Admin is the first user that is created during installation. This role has the highest level of privilege and allows all read and write actions on all YugabyteDB Anywhere resources. There can be only one Super Admin. Super Admin can perform the following:
- Manage all resources, including universes, nodes, backup, restore, and cloud providers.
- Manage the user access control by creating and managing users.
For more information, see Create admin user.
-
Admin has privileges that are similar to the Super Admin, except that Admin cannot manage global scope artifacts and actions, such as runtime configuration settings and LDAP authentication.
-
Backup Admin has access to backup-related tasks, such as the following:
- Manage database backups and restore operations.
- Create new backups.
- Delete any existing backup or backup schedule.
- Edit existing backups.
Backup Admin has view permissions for all other resources.
-
Read Only access level provides view permissions for the UI and API.
-
Connect Only access level allows users to sign in and access their user profile only. This role is assigned to users who are not explicitly assigned a role.
You can't delete or edit built-in roles.
Manage users
As a Super Admin or Admin, you can invite new users and manage existing users for your YugabyteDB Anywhere instance.
How you add and modify users varies depending on whether you have enabled fine-grained RBAC. You can only assign, create, and modify custom roles if you have enabled fine-grained RBAC.
You can invite new users to your YugabyteDB Anywhere instance as follows:
-
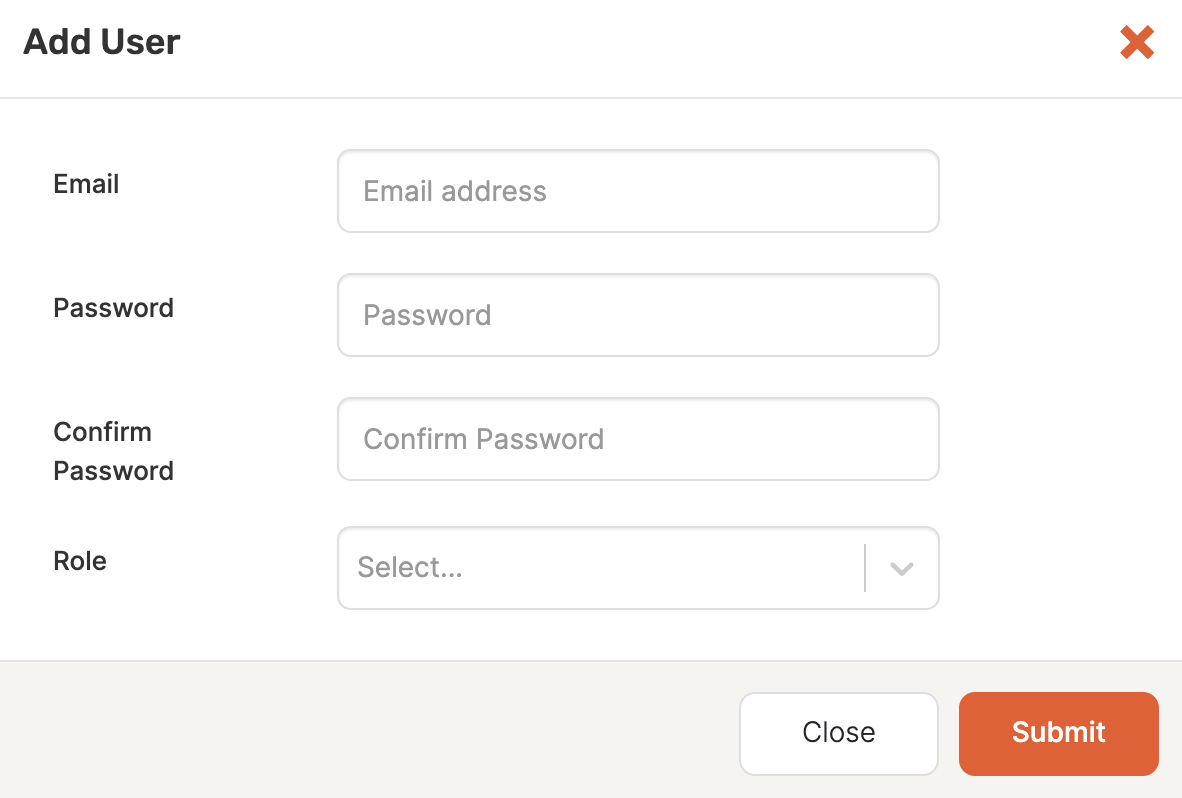
Navigate to Admin > User Management > Users and click Add User.

-
Enter the user's email.
-
Enter a password for the user to sign in with.
-
Select a built-in role for the user.
-
Click Submit.
To modify a user role, navigate to Admin > User Management > Users, click Actions that corresponds to the specific user, and choose Edit User Role.
Using fine-grained RBAC, you can assign built-in and custom roles to users to determine the actions they are allowed to perform, and specify the universes that they can access.
To create a user, do the following:
-
Navigate to Admin > Access Management > Users, and click Create User.

-
Enter the user's email.
-
Enter a password for the user to sign in with.
-
To assign a built-in role, under Built-in Role, click Assign New Built-in Role, and select a built-in role.
-
To assign a custom role, under Custom Role, click Assign New Custom Role, and select a custom role.
By default, users have access to all present and future universes.

-
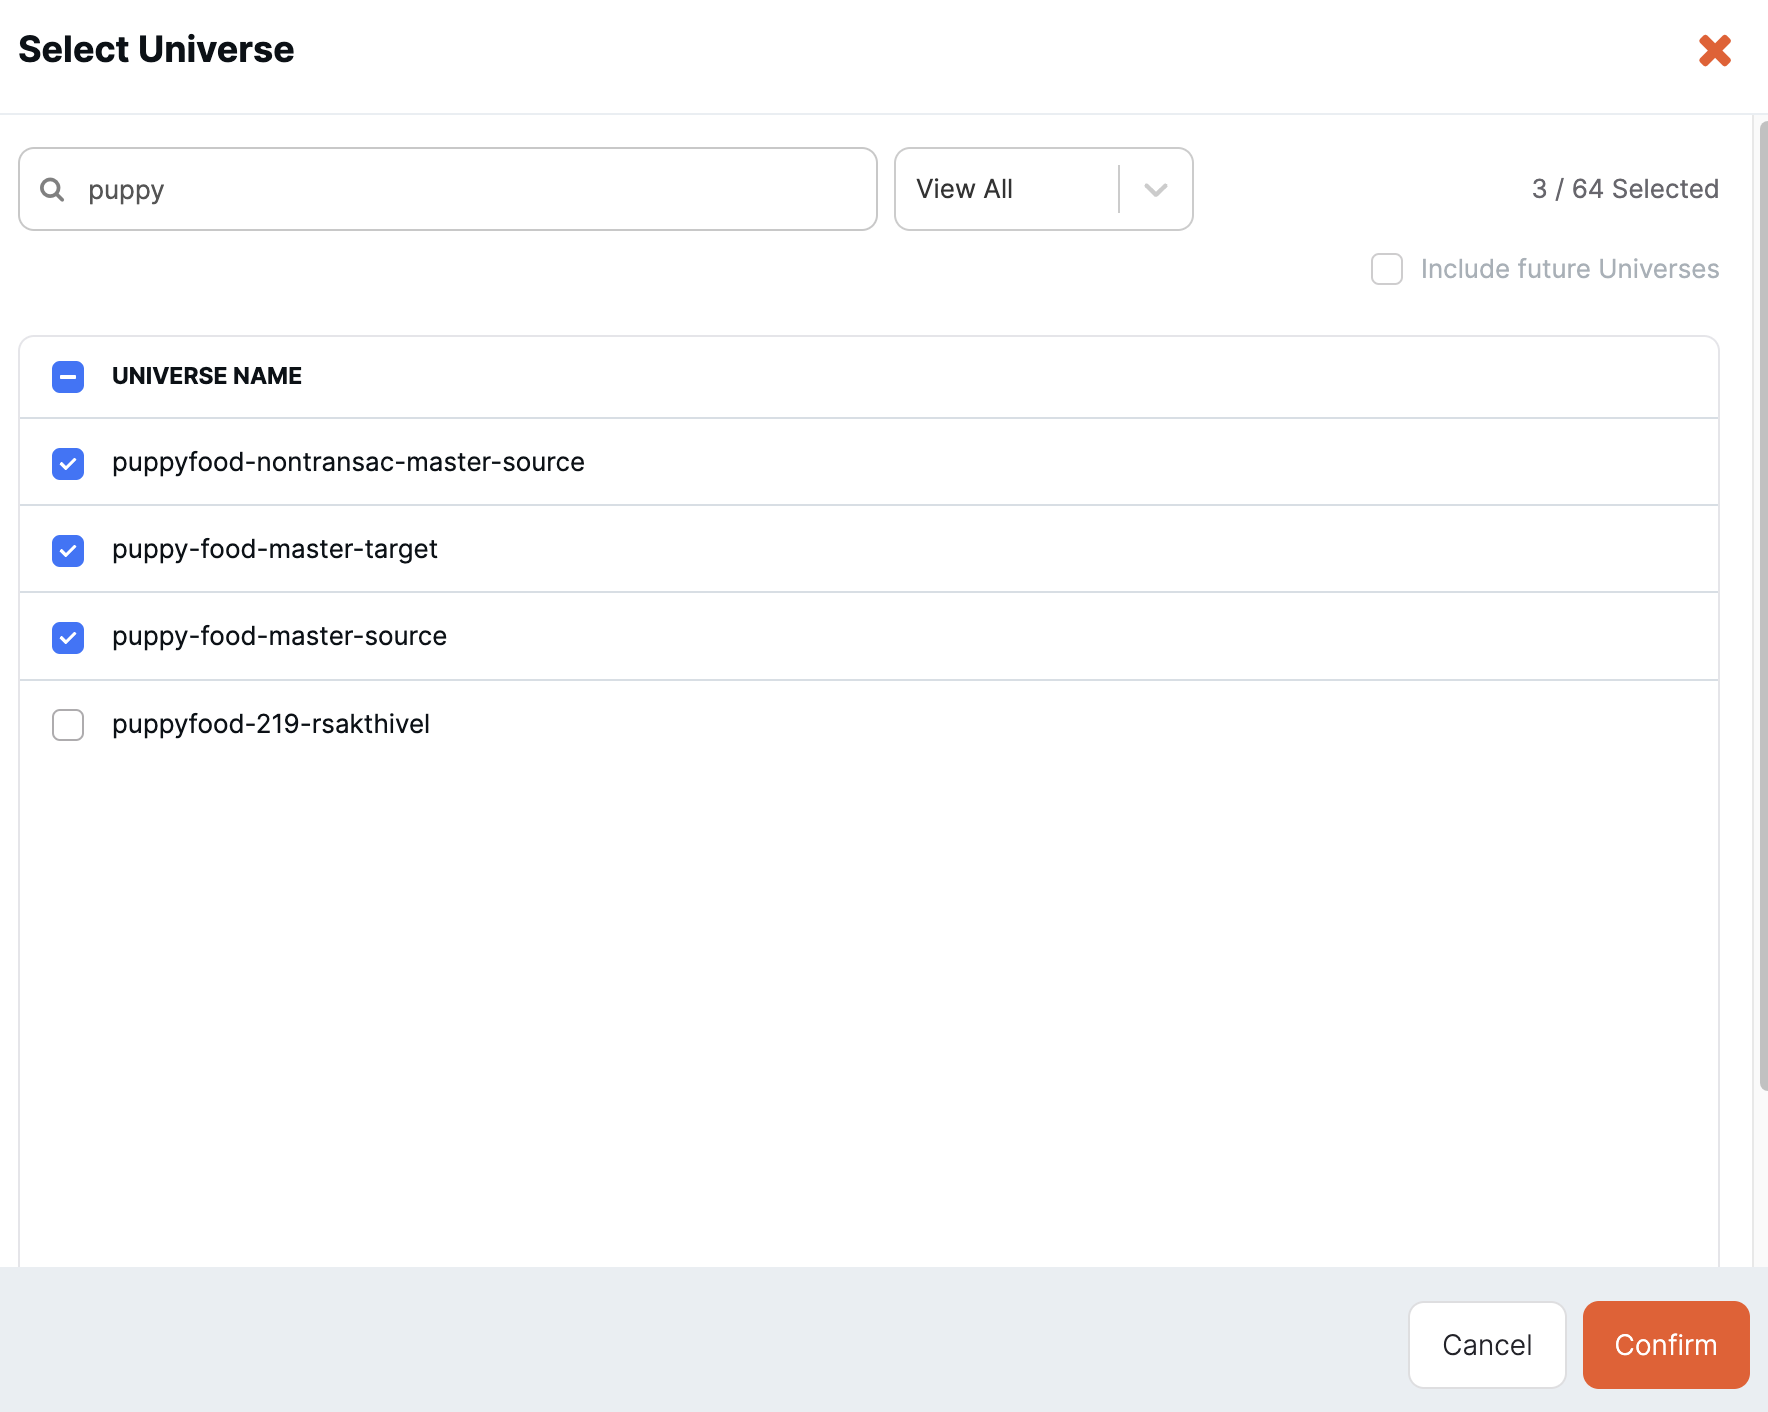
To customize access to universes, assign at least one custom role, then click Edit Selection, and select the universes that you want to grant access for. Select the Include future universes option to automatically grant this user access to any universe created in the future. Click Confirm when you are done.

-
Click Add User.
To modify a user, do the following:
-
Navigate to Admin > Access Management > Users, click Actions for the user to modify, and choose Edit Assigned Roles.
-
To change the built-in role, under Built-in Role, change the role.
To add a built-in role, click Assign New Built-in Role.
-
To change the custom role, under Custom Role, change the existing role.
To add a custom role, click Assign New Custom Role.
-
To customize access to universes, assign at least one custom role, then click Edit Selection, and select the universes that you want to grant access for. Select the Include future universes option to automatically grant access to any universe created in the future. Click Confirm when you are done.
-
Click Edit User.
To delete a user, navigate to Admin > Access Management > Users, click Actions for the user to delete, and choose Delete User.
Manage custom roles
If fine-grained RBAC is enabled, as a Super Admin or Admin, you can:
- create custom roles
- clone built-in and custom roles
- modify and delete custom roles
To create a custom role, do the following:
-
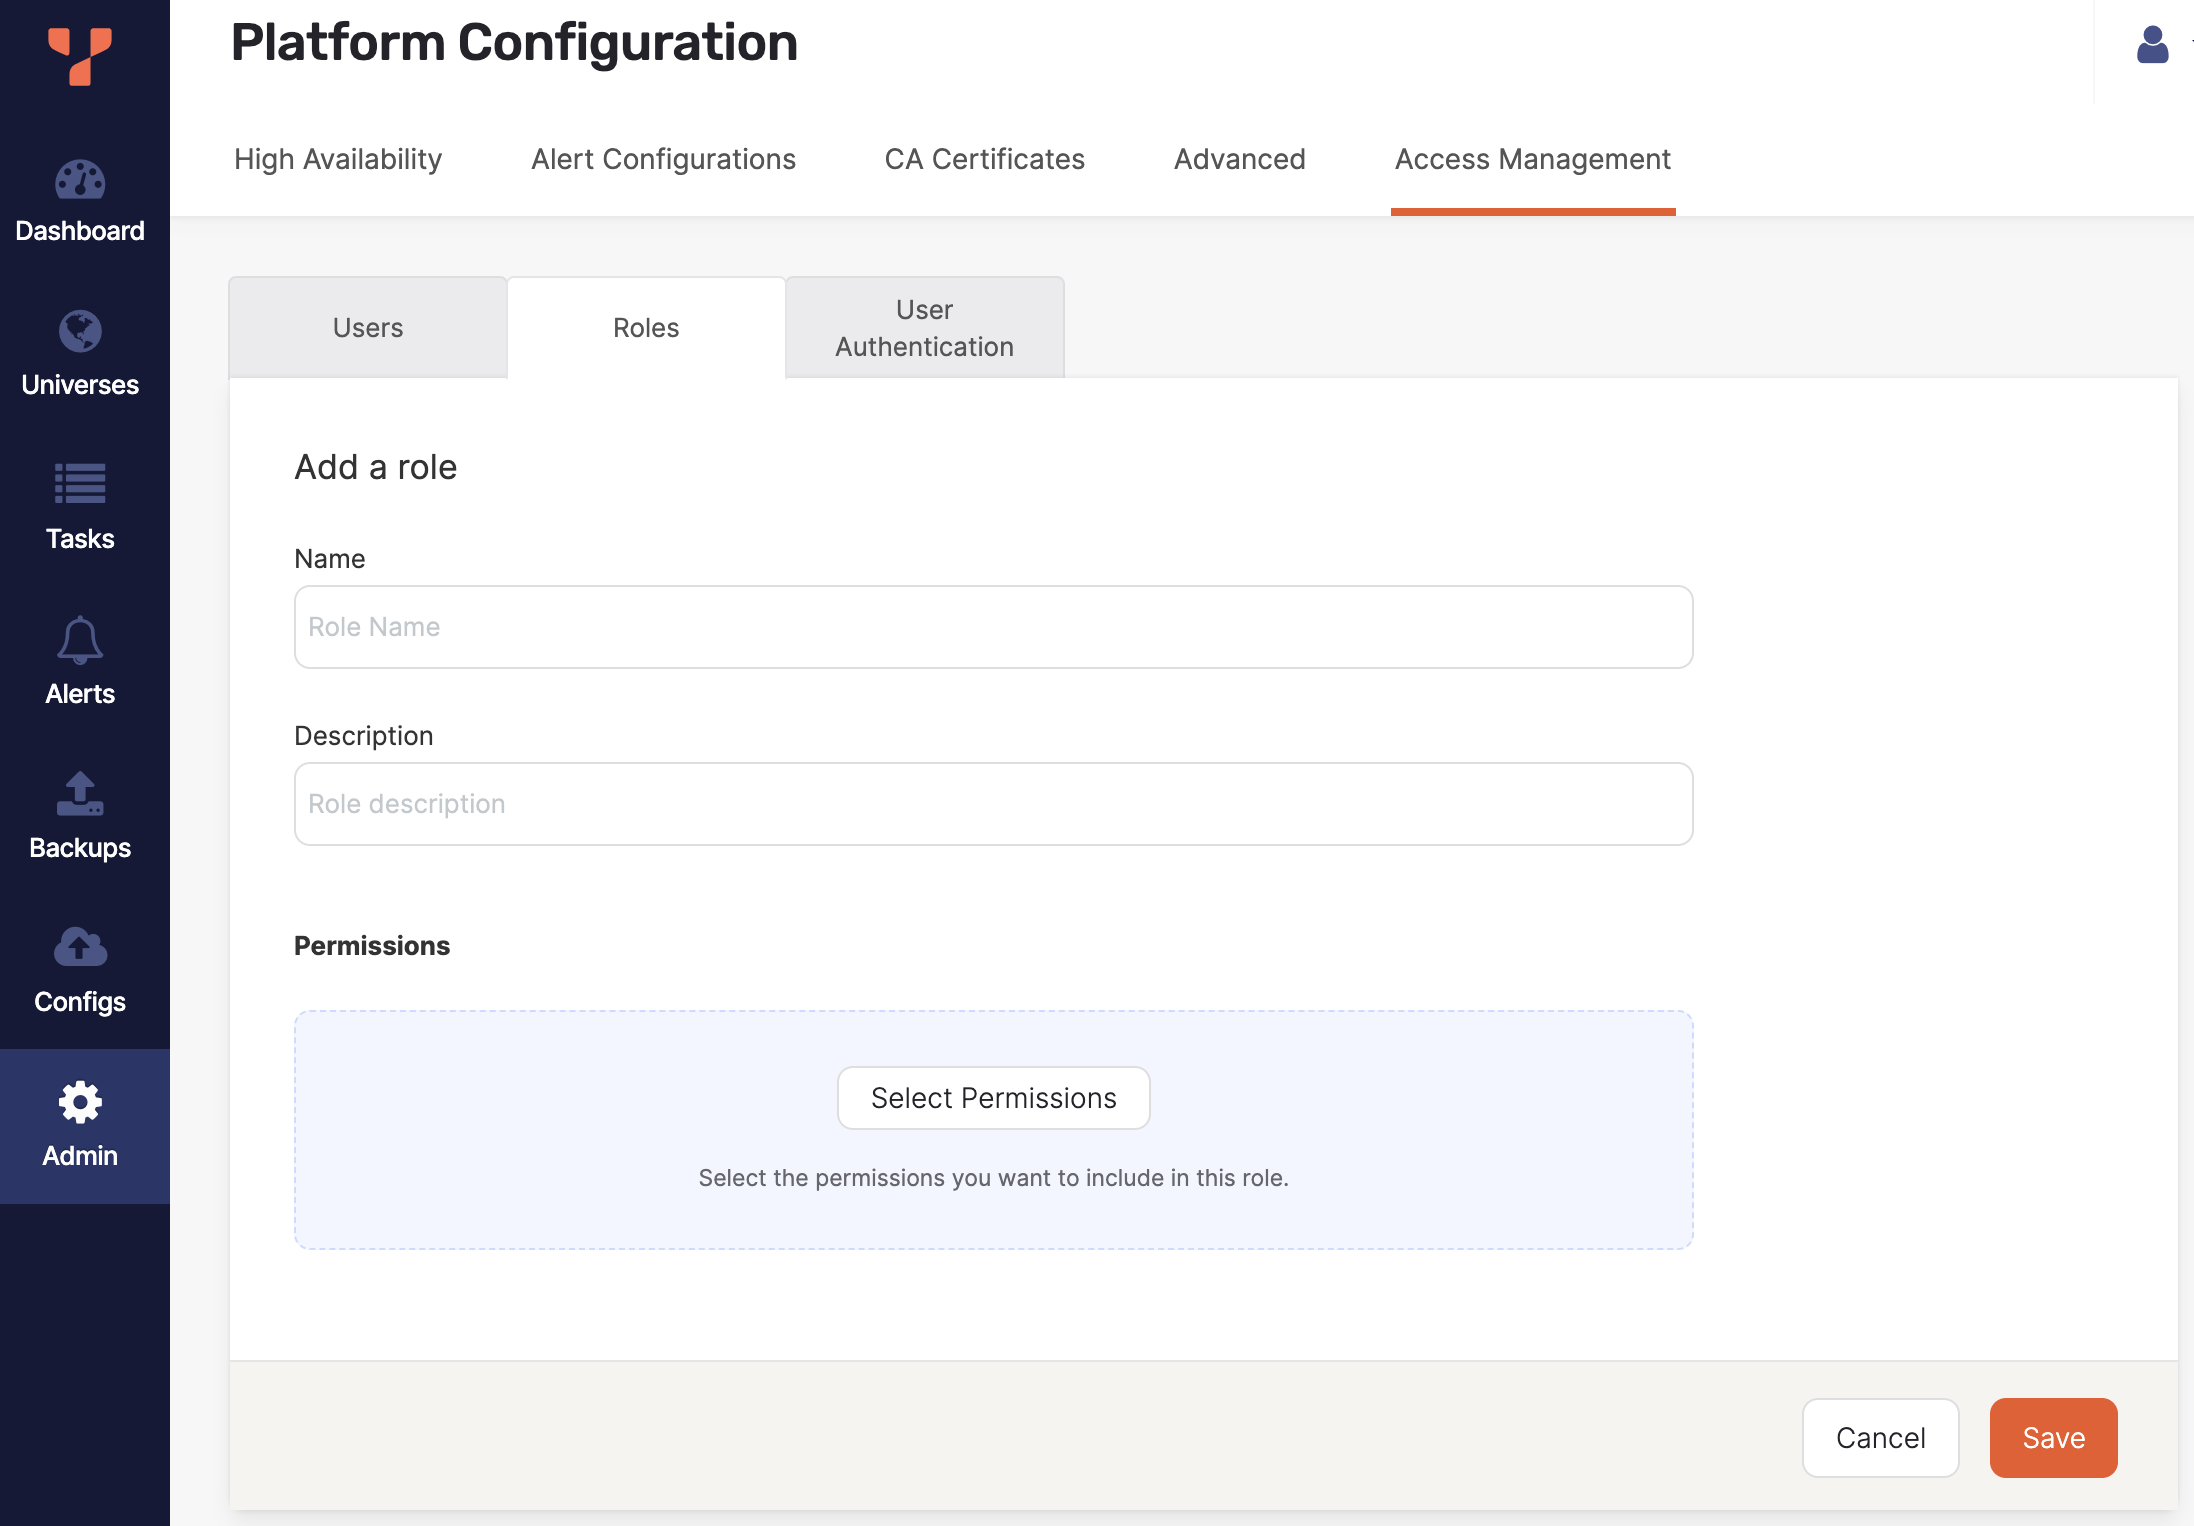
Navigate to Admin > Access Management > Roles and click Create Role.

-
Enter a name for the role.
-
Enter a description for the role.
-
Click Select Permissions.
-
Select the permissions to assign to the role and click Confirm when you are done.
-
Click Save.
To create a custom role from an existing role, do the following:
- Navigate to Admin > Access Management > Roles, click Actions for the role to clone, and choose Clone Role.
- Enter a name for the role.
- Enter a description for the role.
- Click Edit Permissions.
- Select the permissions to assign to the role and click Confirm when you are done.
- Click Save.
To edit a custom role, do the following:
- Navigate to Admin > Access Management > Roles, click Actions for the role to edit, and choose Edit Role.
- On the Configurations tab click Edit Permissions.
- Select the permissions to assign to the role and click Confirm when you are done.
- Click Save.
To delete a role, navigate to Admin > Access Management > Roles, click Actions for the role to edit, and choose Edit Role.
To view the users that have been assigned a role, navigate to Admin > Access Management > Roles, click Actions for the role, and choose View Assigned Users.
Fine-grained RBAC limitations
- Currently, the View Universe permission additionally requires the View Resource permission to work correctly with metrics, performance advisor, and other resources.
- Deleting backups via the delete backup API requires the Delete Resource permission, but when deleting a universe you can choose to delete the associated backups even if you only have the Delete Universe permission.
- Retrying and aborting a task can require different permissions than executing it the first time.
- Currently, when creating a user, you can select Include Future Universes only when you have selected all current universes.
- You may need to refresh your browser after creating a universe to apply the permissions for the newly created universe.
- Currently, LDAP group mapping is not supported for custom roles. Only built-in roles are supported for LDAP users.
- The View Resource permission provides view access to all logs, task logs, and so on.