Amazon MSK EARLY ACCESS
Amazon Managed Streaming for Apache Kafka (Amazon MSK) is a fully managed, highly available, and secure Apache Kafka service offered by Amazon Web Services (AWS). Using Amazon MSK, you can build and run applications using Apache Kafka without having to manage and operate your own Kafka clusters.
This tutorial describes how to configure Yugabyte CDC and stream data into Amazon MSK using Debezium connector, and assumes some familiarity with AWS, Apache Kafka, and CDC.

Configure IAM roles and policies
Create a new role with the required accesses to AWS services.
The following example uses the name yb_cdc_kafka_role. The IAM roles and policies are generic and can be fine-tuned based on your organization IT policies. Configure the Trusted entities as follows:
{
  "Version": "2012–10–17",
  "Statement": [
    {
      "Effect": "Allow",
      "Principal": {
        "Service": "kafkaconnect.amazonaws.com"
      },
      "Action": "sts:AssumeRole"
    }
  ]
}
Create a policy with access to the following AWS services:
- Apache Kafka APIs for MSK
- EC2
- MSK Connect
- S3
- CloudWatch
{
  "Version": "2012–10–17",
  "Statement": [
    {
      "Sid": "VisualEditor0",
      "Effect": "Allow",
      "Action": "ec2:CreateNetworkInterface",
      "Resource": "arn:aws:ec2:*:*:network-interface/*",
      "Condition": {
        "StringEquals": {
          "aws:RequestTag/AmazonMSKConnectManaged": "true"
        },
        "ForAllValues:StringEquals": {
          "aws:TagKeys": "AmazonMSKConnectManaged"
        }
      }
    },
    {
      "Sid": "VisualEditor1",
      "Effect": "Allow",
      "Action": "ec2:CreateTags",
      "Resource": "arn:aws:ec2:*:*:network-interface/*",
      "Condition": {
        "StringEquals": {
          "ec2:CreateAction": "CreateNetworkInterface"
        }
      }
    },
    {
      "Sid": "VisualEditor2",
      "Effect": "Allow",
      "Action": [
        "ec2:DetachNetworkInterface",
        "ec2:CreateNetworkInterfacePermission",
        "ec2:DeleteNetworkInterface",
        "ec2:AttachNetworkInterface"
      ],
      "Resource": "arn:aws:ec2:*:*:network-interface/*",
      "Condition": {
        "StringEquals": {
          "ec2:ResourceTag/AmazonMSKConnectManaged": "true"
        }
      }
    },
    {
      "Sid": "VisualEditor3",
      "Effect": "Allow",
      "Action": "ec2:CreateNetworkInterface",
      "Resource": [
        "arn:aws:ec2:*:*:subnet/*",
        "arn:aws:ec2:*:*:security-group/*"
      ]
    },
    {
      "Sid": "VisualEditor4",
      "Effect": "Allow",
      "Action": [
        "cloudwatch:PutDashboard",
        "cloudwatch:PutMetricData",
        "cloudwatch:DeleteAlarms",
        "kafkaconnect:ListConnectors",
        "cloudwatch:DeleteInsightRules",
        "cloudwatch:StartMetricStreams",
        "cloudwatch:DescribeAlarmsForMetric",
        "cloudwatch:ListDashboards",
        "cloudwatch:ListTagsForResource",
        "kafka-cluster:AlterCluster",
        "kafkaconnect:CreateWorkerConfiguration",
        "cloudwatch:PutAnomalyDetector",
        "kafka-cluster:Connect",
        "kafkaconnect:UpdateConnector",
        "cloudwatch:DescribeInsightRules",
        "cloudwatch:GetDashboard",
        "cloudwatch:GetInsightRuleReport",
        "kafka-cluster:ReadData",
        "cloudwatch:DisableInsightRules",
        "cloudwatch:GetMetricStatistics",
        "cloudwatch:DescribeAlarms",
        "cloudwatch:GetMetricStream",
        "kafka-cluster:*Topic*",
        "kafkaconnect:DescribeConnector",
        "cloudwatch:GetMetricData",
        "cloudwatch:ListMetrics",
        "cloudwatch:DeleteAnomalyDetector",
        "kafkaconnect:ListWorkerConfigurations",
        "cloudwatch:DescribeAnomalyDetectors",
        "cloudwatch:DeleteDashboards",
        "kafka-cluster:AlterGroup",
        "cloudwatch:DescribeAlarmHistory",
        "cloudwatch:StopMetricStreams",
        "cloudwatch:DisableAlarmActions",
        "kafkaconnect:DescribeWorkerConfiguration",
        "kafkaconnect:CreateConnector",
        "kafkaconnect:ListCustomPlugins",
        "cloudwatch:DeleteMetricStream",
        "cloudwatch:SetAlarmState",
        "kafka-cluster:DescribeGroup",
        "cloudwatch:GetMetricWidgetImage",
        "kafkaconnect:DescribeCustomPlugin",
        "s3:*",
        "kafka-cluster:DescribeCluster",
        "cloudwatch:EnableInsightRules",
        "cloudwatch:PutCompositeAlarm",
        "cloudwatch:PutMetricStream",
        "cloudwatch:PutInsightRule",
        "cloudwatch:PutMetricAlarm",
        "cloudwatch:EnableAlarmActions",
        "cloudwatch:ListMetricStreams",
        "kafkaconnect:CreateCustomPlugin",
        "kafkaconnect:DeleteConnector",
        "kafkaconnect:DeleteCustomPlugin",
        "kafka-cluster:WriteData"
      ],
      "Resource": "*"
    },
    {
      "Sid": "VisualEditor5",
      "Effect": "Allow",
      "Action": "ec2:DescribeNetworkInterfaces",
      "Resource": "arn:aws:ec2:*:*:network-interface/*",
      "Condition": {
        "StringEquals": {
          "ec2:ResourceTag/AmazonMSKConnectManaged": "true"
        }
      }
    }
  ]
}
Enable CDC on YugabyteDB
Ensure that YugabyteDB is up and running. To install YugabyteDB on your cloud virtual machine, refer to Quick start.
-
Create a test table:
CREATE TABLE test (id INT PRIMARY KEY, name TEXT); -
Enable CDC using the yb-admin create_change_data_stream command to enable CDC on all the schemas and tables in the YugabyteDB database as follows:
./yb-admin -master_addresses <master_addresses>:7100 \
     create_change_data_stream ysql.yugabyte \
    -certs_dir_name /home/yugabyte/yugabyte-tls-config/
If you have a multi-node YugabyteDB setup, you need to provide a comma-separated list of host:port values of both the leader and the follower nodes as the
master_addressesargument.If successful, the command returns the CDC stream ID:
CDC Stream ID: 90fe97d59a504bb6acbfd6a940
For more information on CDC commands, refer to Change data capture commands.
Configure the AWS Security Group
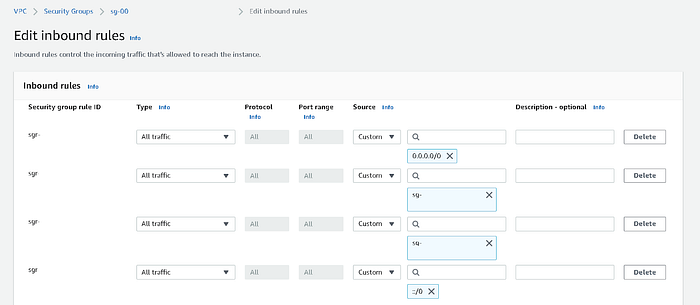
Create a Security Group with inbound and outbound rules configured to ensure access to the MSK cluster and YugabyteDB. For this example, enable incoming traffic from all the ports.
Upload Debezium connector Jar file to the S3 bucket
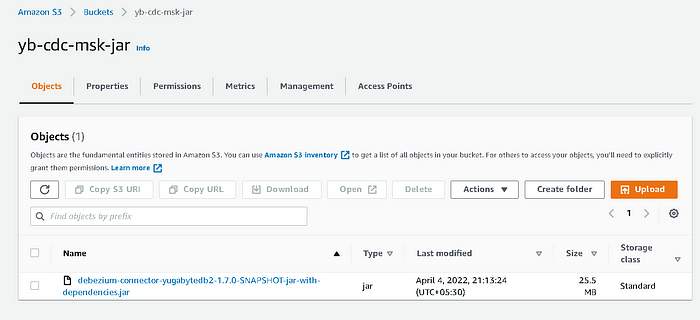
Download the YugabyteDB Debezium connector jar from the repository and upload it to an S3 bucket.
Configure the Amazon MSK cluster
For this example, create an Amazon MSK cluster in the same VPC as that of the YugabyteDB cluster. Note that this is a generic configuration, and it may differ based on your organizational IT policy.
-
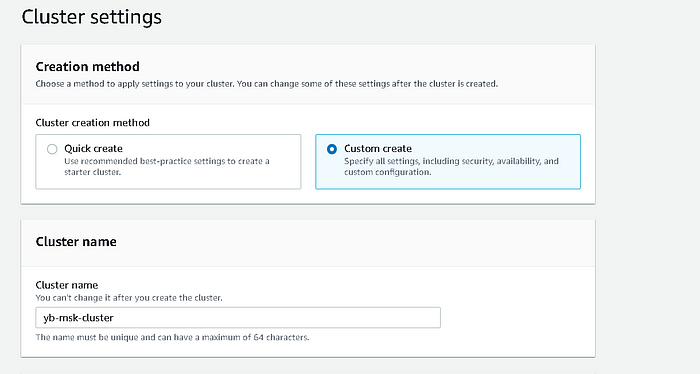
Navigate to Cluster Settings.
-
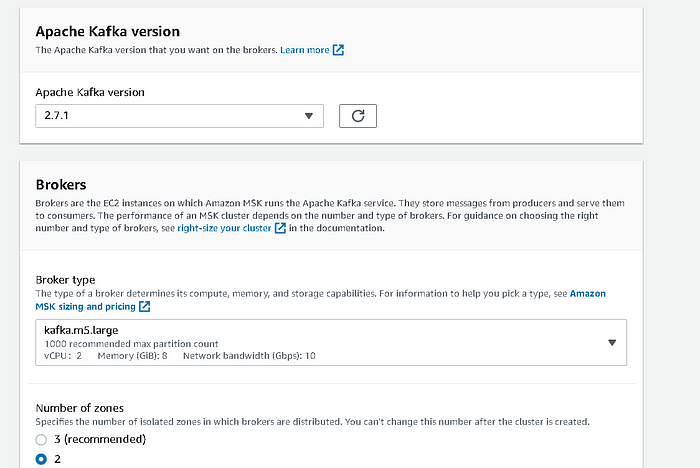
Create a cluster with two zones.
-
In the Networking section, select the same VPC and Private subnets as used by the YugabyteDB cluster.
-
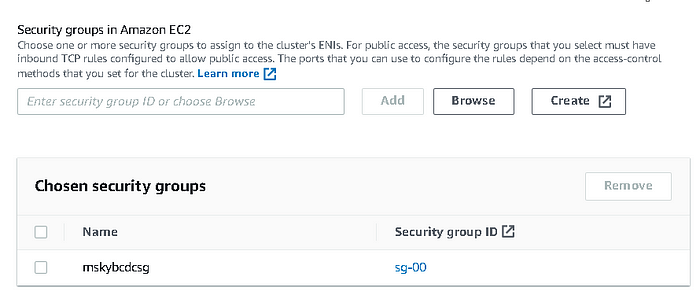
Choose the security group you created previously.
-
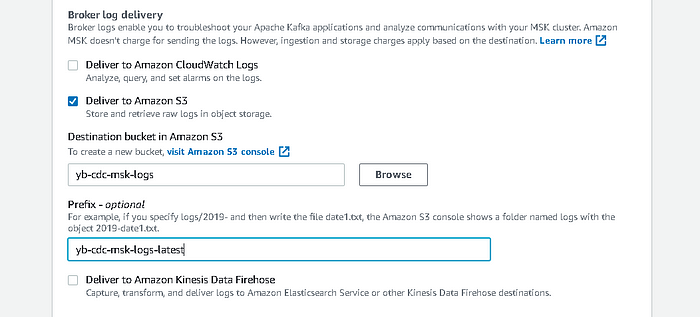
Enable logging on your cluster to help with debugging. This example uses the S3 bucket to store the logs.
The cluster is now configured successfully.