Set up transactional xCluster replication
The following assumes you have set up Primary and Standby universes. Refer to Set up universes.
Set up replication
To set up unidirectional transactional replication manually, do the following:
-
Create a new database on the Primary and Standby universes with the same name.
-
Create tables and indexes on both Primary and Standby; the schema must match between the databases, including the number of tablets per table.
For example, create the following tables on the Primary and Standby:
create table ordering_test (id int) split into 8 tablets; create table customers ( customer_id UUID, company_name text, customer_state text, primary key (customer_id) ) split into 8 tablets; create table orders ( customer_id uuid, order_id int primary key, order_details jsonb, product_name text, product_code text, order_qty int, constraint fk_customer foreign key(customer_id) references customers(customer_id) ) split into 8 tablets; create index order_covering_index on orders (customer_id, order_id) include( order_qty ) split into 8 tablets; create table if not exists account_balance ( id uuid, name text, salary int, primary key (id) ) split into 8 tablets; create index account_balance_secondary_index on account_balance(name) split into 8 tablets; create table if not exists account_sum ( sum int ) split into 8 tablets; -
Enable point in time restore (PITR) on the Standby database:
./bin/yb-admin \ -master_addresses <standby_master_addresses> \ create_snapshot_schedule 1 10 ysql.yugabyte -
If the Primary universe already has data, then follow the bootstrap process described in Bootstrap a target universe before setting up replication with the transactional flag.
-
Set up xCluster replication from Primary to Standby using yb-admin as follows:
./bin/yb-admin \ -master_addresses <standby_master_addresses> \ -certs_dir_name <cert_dir> \ setup_universe_replication \ <primary_universe_uuid>_<replication_name> \ <primary_universe_master_addresses> \ <comma_separated_primary_table_ids> \ <comma_separated_primary_bootstrap_ids> transactional -
Set the role of the Standby universe to
STANDBY:./bin/yb-admin \ -master_addresses <standby_master_addresses> \ -certs_dir_name <dir_name> \ change_xcluster_role STANDBY
To set up unidirectional transactional replication using YugabyteDB Anywhere, do the following:
-
On the Primary universe (with and without data), create a new database.
For example:
create database ybdb; \c ybdb -
Create your tables and indexes.
For example, create the following:
create database ybdb; \c ybdb create table ordering_test (id int); create table customers (customer_id UUID, company_name text, customer_state text, primary key (customer_id)); create table orders(customer_id uuid, order_id int primary key, order_details jsonb, product_name text,product_code text, order_qty int, constraint fk_customer foreign key(customer_id) references customers(customer_id)); create index order_covering_index on orders (customer_id, order_id) include( order_qty); create table if not exists account_balance (id uuid, name text, salary int, primary key (id)); create index account_balance_secondary_index on account_balance(name); create table if not exists account_sum ( sum int ); -
On the Standby, create a new database with the same name (with and without data).
During initial replication setup, you don't need to create objects on the Standby cluster. xCluster bootstrap auto-creates tables and objects and restores data on the Standby from the Primary cluster.
-
In YugabyteDB Anywhere, enable point-in-time recovery for the Primary and Standby universes as follows:
-
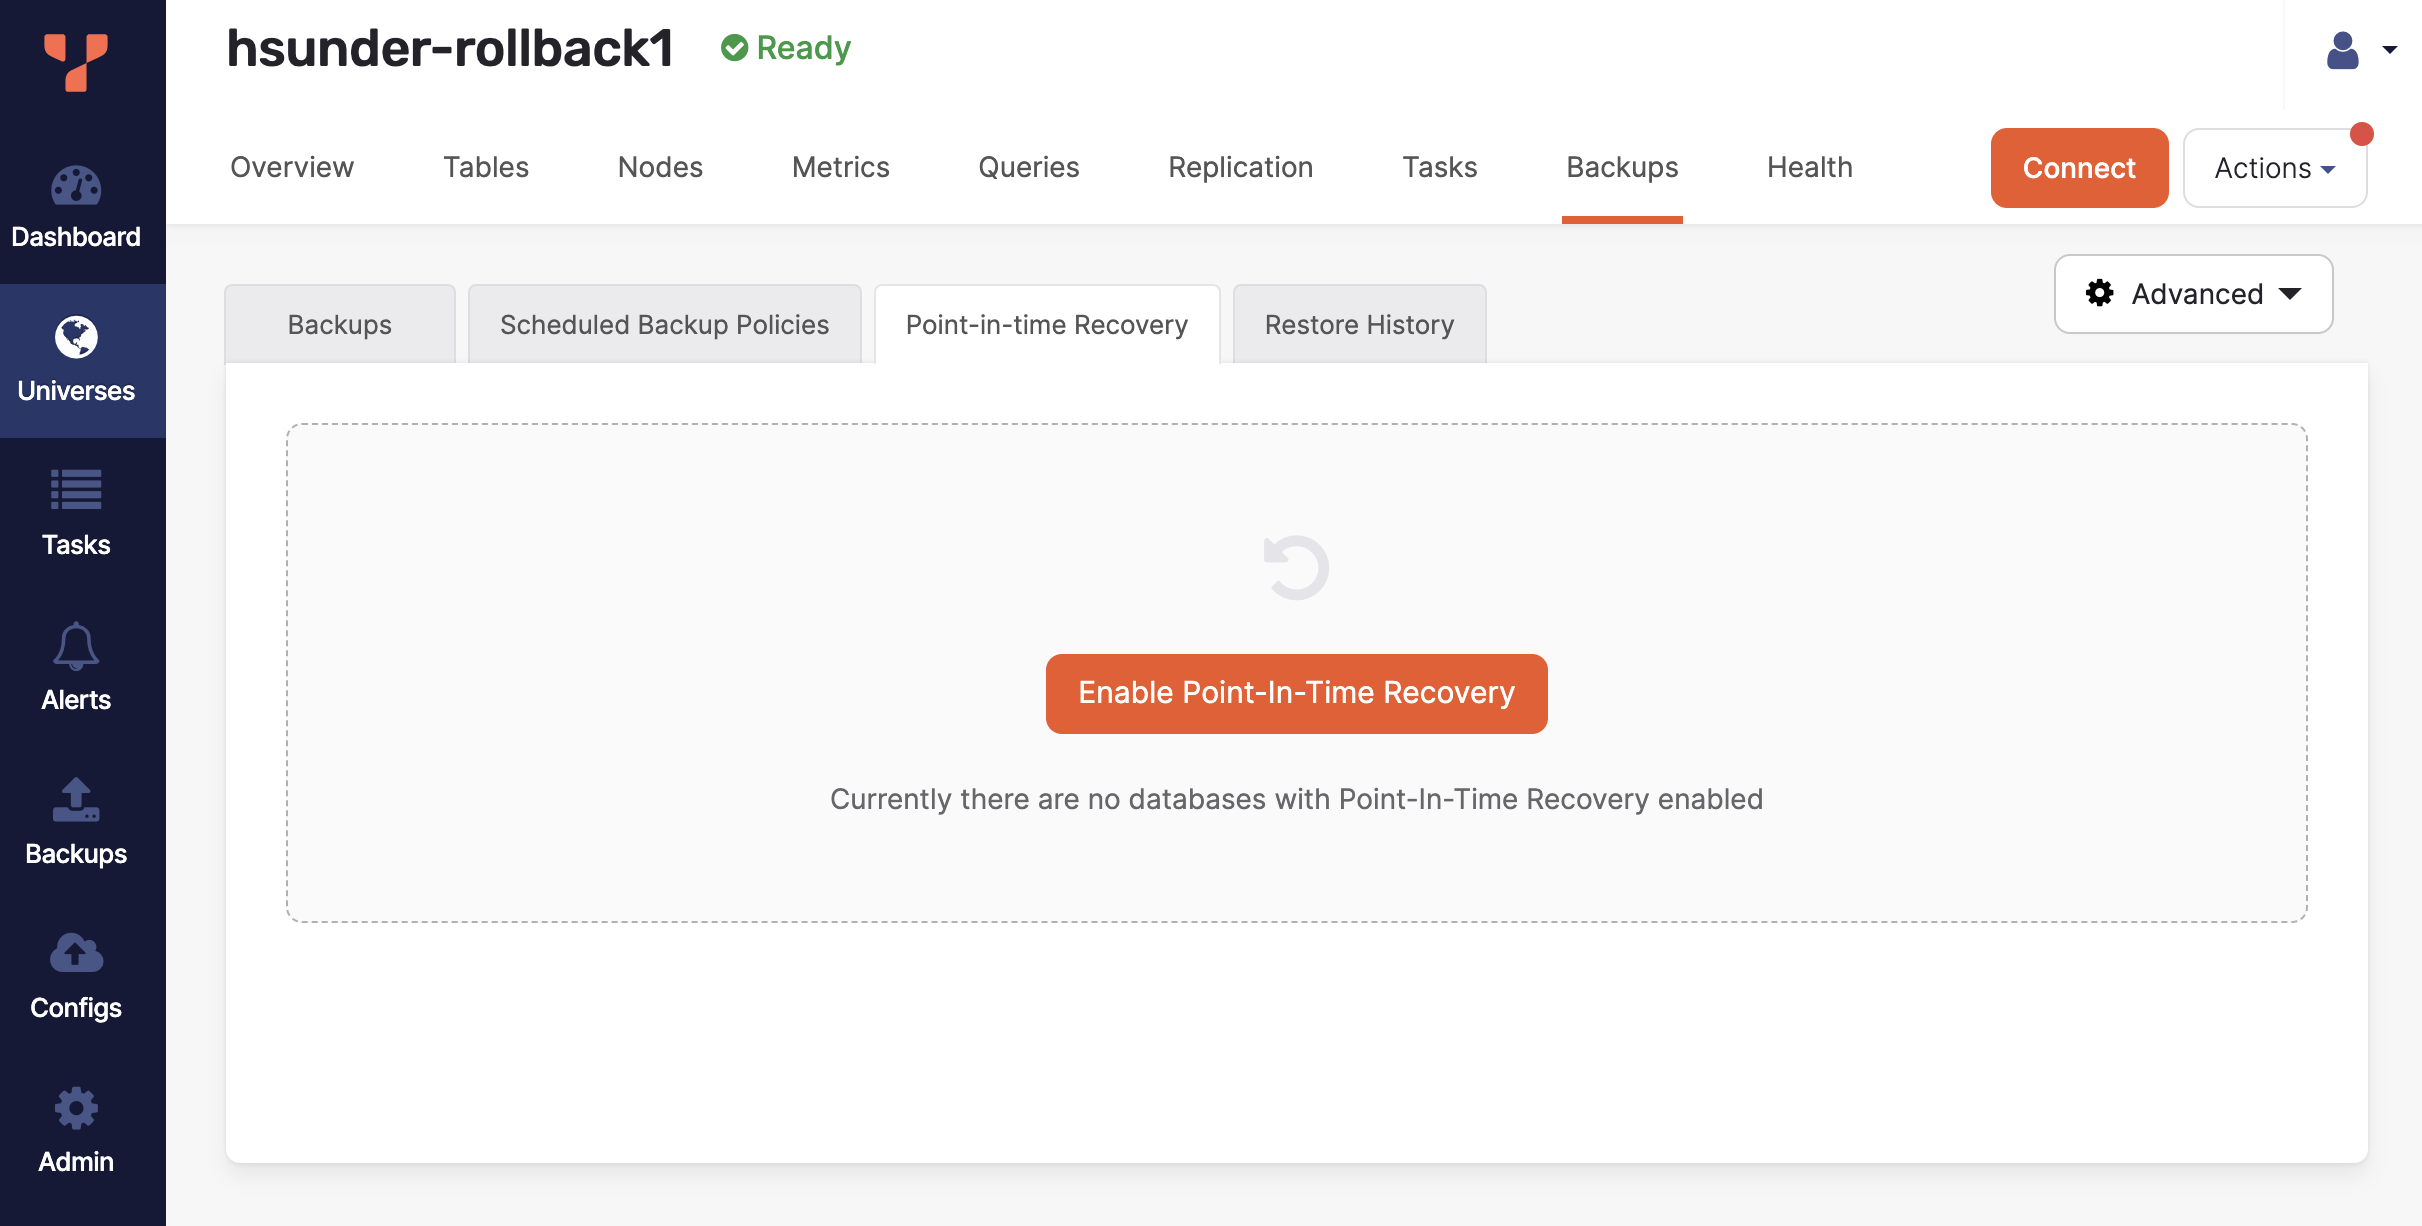
Navigate to the universe, Backups > Point-in-time Recovery, and click Enable Point-in-Time Recovery.

-
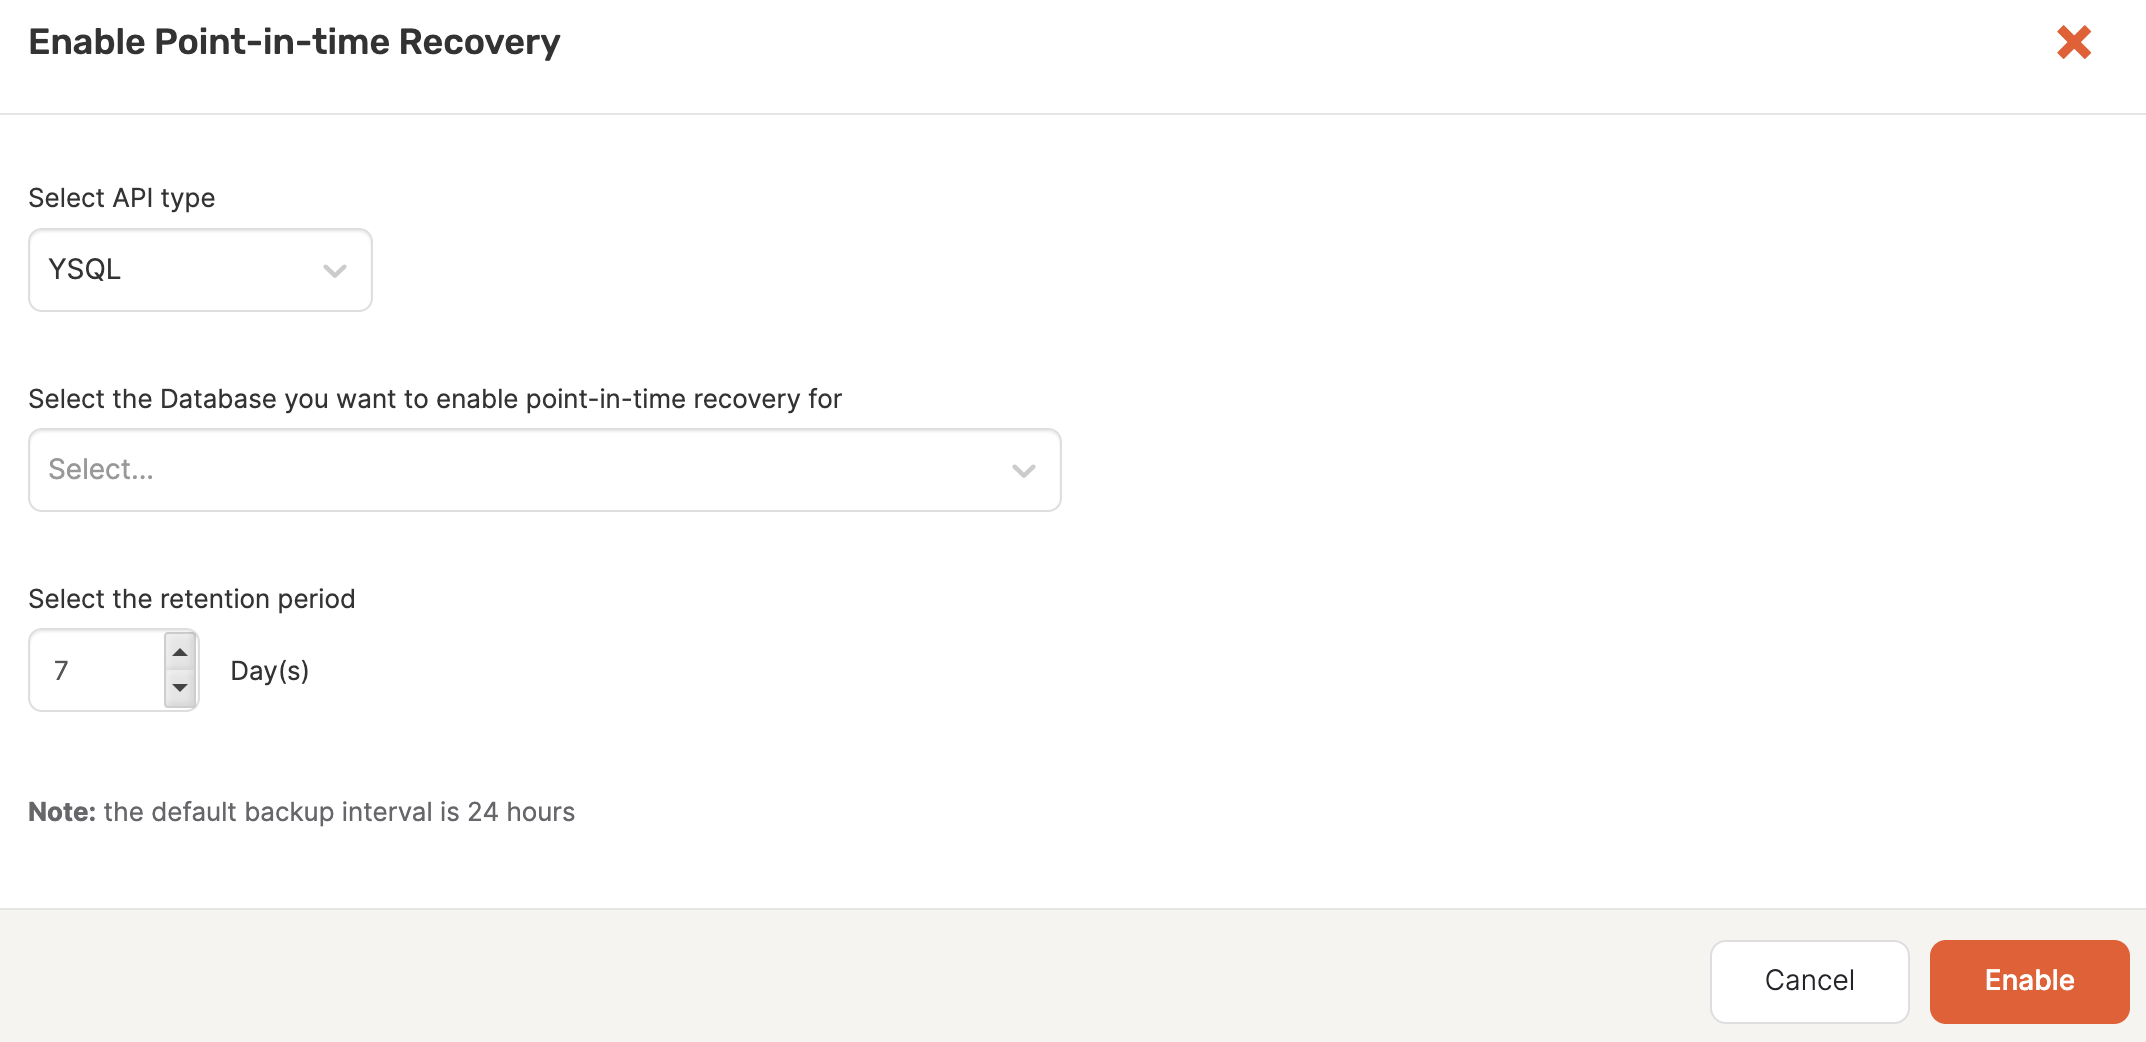
Choose the API, select your database, and specify the retention period, then click Enable.

For more information on setting up PITR in YugabyteDB Anywhere, refer to Point-in-time recovery.
-
-
Set up xCluster replication from Primary to Standby as follows:
-
Navigate to your Primary universe, select the Replication tab, and click Configure Replication.
-
Enter a name for the replication, set the target universe to the Standby, and click Next: Select Tables.
-
Select the Enable transactional atomicity option.
-
Select your database and click Validate Table Selection.
If there is data in the databases, then YBA will walk you through the backup and restore process.
-
Click Next: Configure Bootstrap.
-
Choose the storage configuration to use for backup and click Bootstrap and Enable Replication.
Note that if there are any connections open against the Standby databases and replication is being set up for a Primary database that already has some data, then Bootstrap and Enable Replication will fail with the following error:
Error ERROR:  database "database_name" is being accessed by other users
DETAIL:  There is 1 other session using the database.
This is because setting up replication requires backing up the Primary database and restoring the backup to the Standby database after cleaning up any pre-existing data on the Standby. Close any connections to the Standby database and retry the replication setup operation.
For more information on setting up replication in YugabyteDB Anywhere, refer to Set up replication.
-
Adding a database to an existing replication
Note that, although you don't need to create objects on Standby during initial replication, when you add a new database to an existing replication stream, you do need to create the same objects on the Standby. If Primary and Standby objects don't match, you won't be able to add the database to the replication.
In addition, If the WALs are garbage collected from Primary, then the database will need to be bootstrapped. The bootstrap process is handled by YBA. Only the single database is bootstrapped, not all the databases involved in the existing replication.
Verify replication
To verify the replication is working, on the Standby, check that xCluster safe time is progressing. This is the indicator of data flow from Primary to Standby.
Use the get_xcluster_safe_time command as follows:
yb-admin \
-master_addresses <standby_master_ips> \
-certs_dir_name <dir_name> \
get_xcluster_safe_time
For example:
./tserver/bin/yb-admin -master_addresses 172.150.21.61:7100,172.150.44.121:7100,172.151.23.23:7100 \
    get_xcluster_safe_time
You should see output similar to the following:
[
    {
        "namespace_id": "00004000000030008000000000000000",
        "namespace_name": "dr_db",
        "safe_time": "2023-06-07 16:31:17.601527",
        "safe_time_epoch": "1686155477601527"
    }
]
Default time reported in xCluster safe time is year 2112. You need to wait until the xCluster safe time on the Standby advances beyond setup replication clock time.